Accessory Dwelling Unit

The Benefits of Modern Design for Your ADU: What You Need to Know

As the popularity of accessory dwelling units (ADUs) and laneway houses continues to rise, so does the demand for modern designs that fit seamlessly into their surroundings.

When it comes to ADU design, modern style has become increasingly popular in recent years. But what does "modern design" actually mean for ADUs, and why should you consider it for your next project? In this blog post, we'll take a closer look at modern design principles that we incorporate into ADUs.

Minimalism and Simplicity

One of the key features of modern design is minimalism and simplicity. This means that modern ADUs often have clean lines, simple forms, and a lack of ornamentation. The focus is on functionality and practicality, which can be especially useful when designing a small space like an ADU. We believe in the philosophy of less, but better. Meaning we keep the form of our ADU designs simple and efficient but invest in high quality systems and materials leading to a better end result. Consider quality over quantity.

Natural Materials

Modern design also emphasizes the use of natural materials, such as wood, stone, and metal. These materials are often used in their raw or untreated state, giving the ADU a more organic and authentic feel. The use of natural materials also helps the ADU blend in with its surroundings and create a more harmonious relationship with nature. We love natural cedar siding, exposed wood in the interiors, and concrete floors. Being true to the materials lets us celebrate how our buildings are built while relying on the natural beauty of the material to be the defining design features in our ADUs.

Energy Efficiency

Modern design principles often prioritize energy efficiency and sustainability. This means incorporating features such as high-quality insulation, efficient heating and cooling systems, LED lighting fixtures, and energy-efficient appliances. By designing an ADU with energy efficiency in mind, you can reduce your carbon footprint and save money on utilities in the long run. This coincides with the simple forms we discussed above, as we aim to design tight building envelopes that are energy efficient and optimized for the local environment.

Open Floor Plans

Another hallmark of modern design is open floor plans, which prioritize flow and connectivity between different spaces. In an ADU, an open floor plan can help create a sense of spaciousness, even in a smaller space. It can also make the ADU feel more versatile and adaptable to different uses. The best example of this is by designing a “great room” that combines the kitchen, dining, and living spaces into one open room. This helps make smaller sized ADUs feel spacious and they are more functional than having separate rooms for each function.

Large Windows and Natural Light

Modern design principles emphasizes the use of large windows and natural light to create bright and airy spaces. This can be especially important in an ADU, where space may be limited. By incorporating large windows and plenty of natural light, you can create an inviting and comfortable space that feels much larger than it actually is. Additional benefits include using natural light which can reduce energy use, and natural ventilation which can create a more comfortable and healthy indoor environment. Plus we use large windows and sliding doors to make strong visual impact on our ADU designs, creating more beautiful design solutions.

Conclusion

Modern design can help create ADUs that are both functional and aesthetically pleasing. By prioritizing minimalism, natural materials, energy efficiency, open floor plans, and natural light, you can have an ADU that is perfect for your needs. Whether you're building an ADU as a rental property, a guest house, or a place for aging relatives to live, a modern design can help you achieve your goals while creating a beautiful and comfortable space that will stand the test of time.

If modern design is inspiring for you and you would like to discuss building an ADU please reach out. We would love to talk through your ideas and project goals and offer advice to help you succeed with your project. Or if you are ready to move forward with a predesigned ADU plan, check out our Modern ADU Plans available for purchase today.

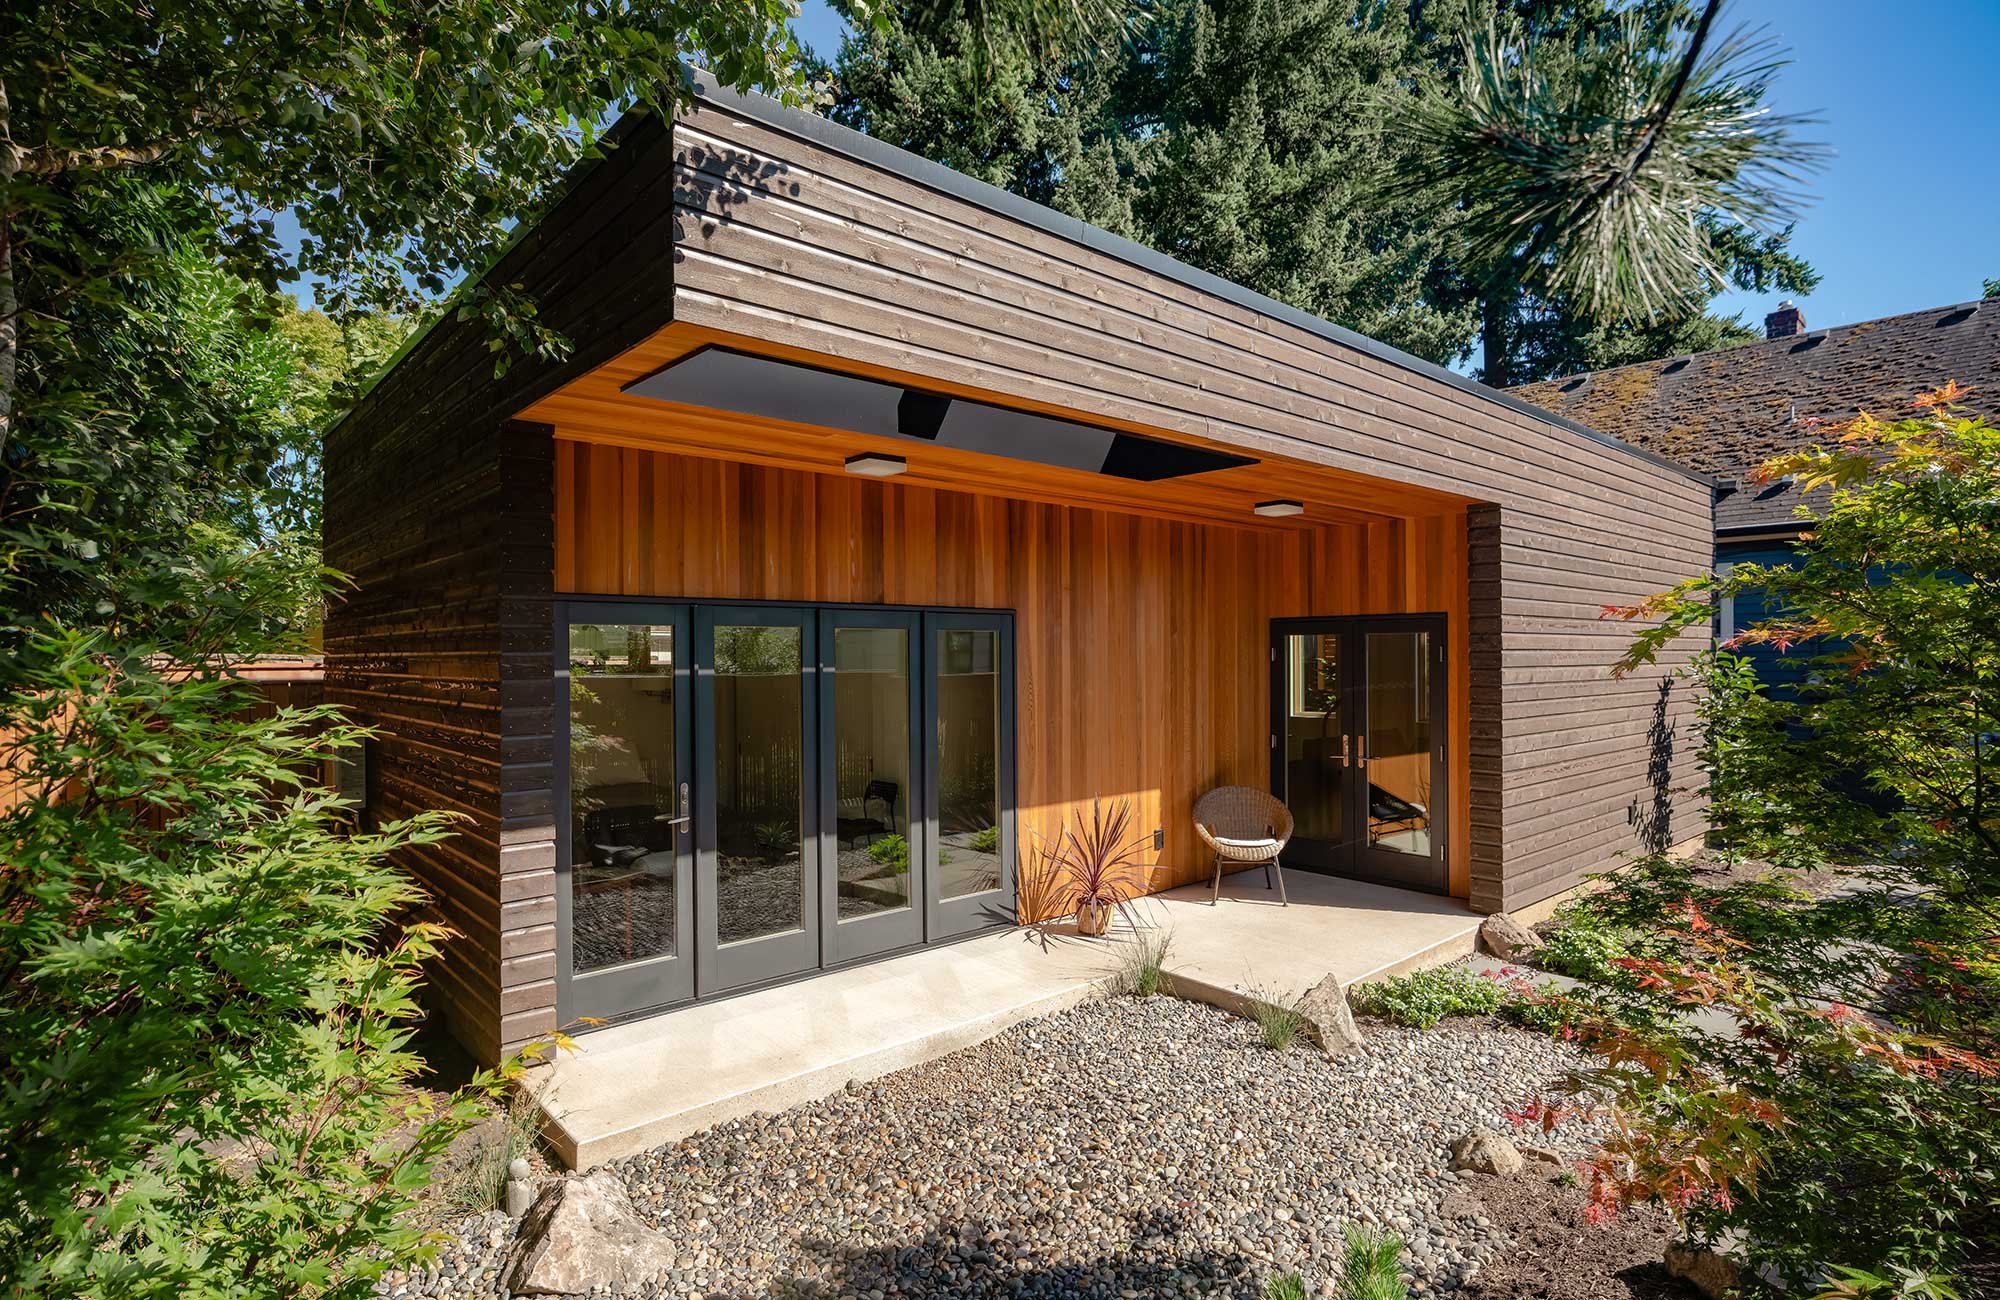
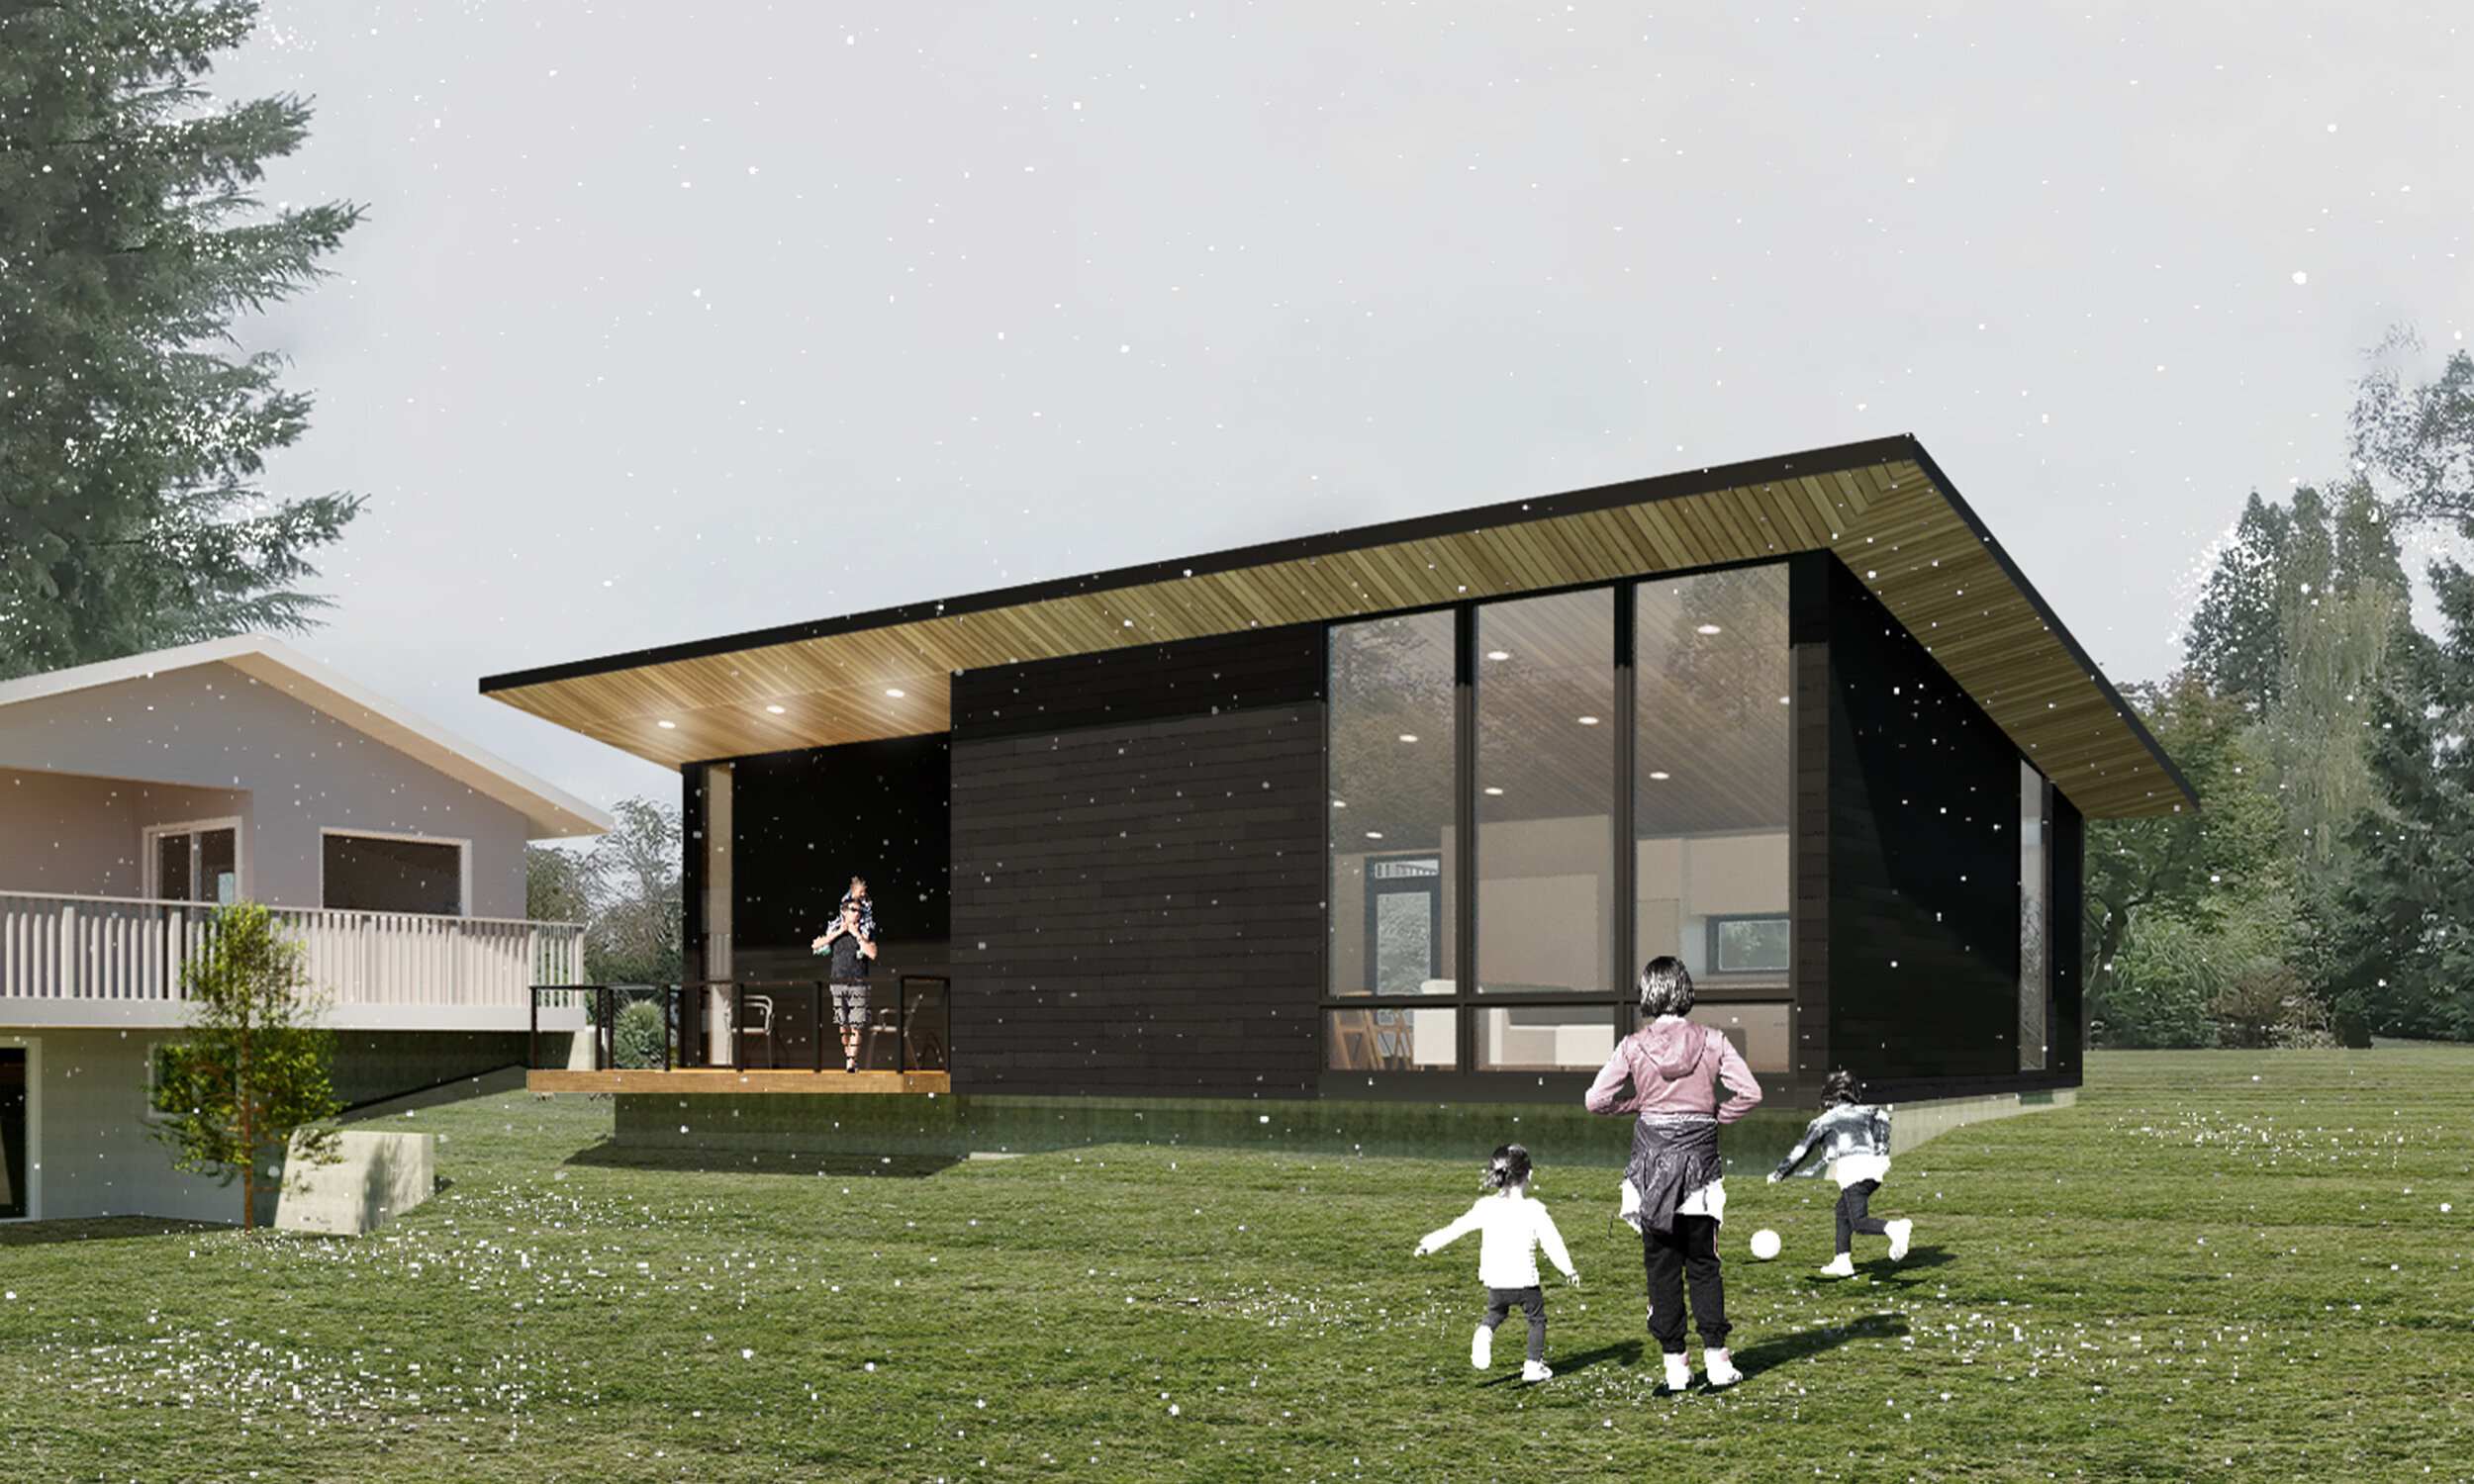
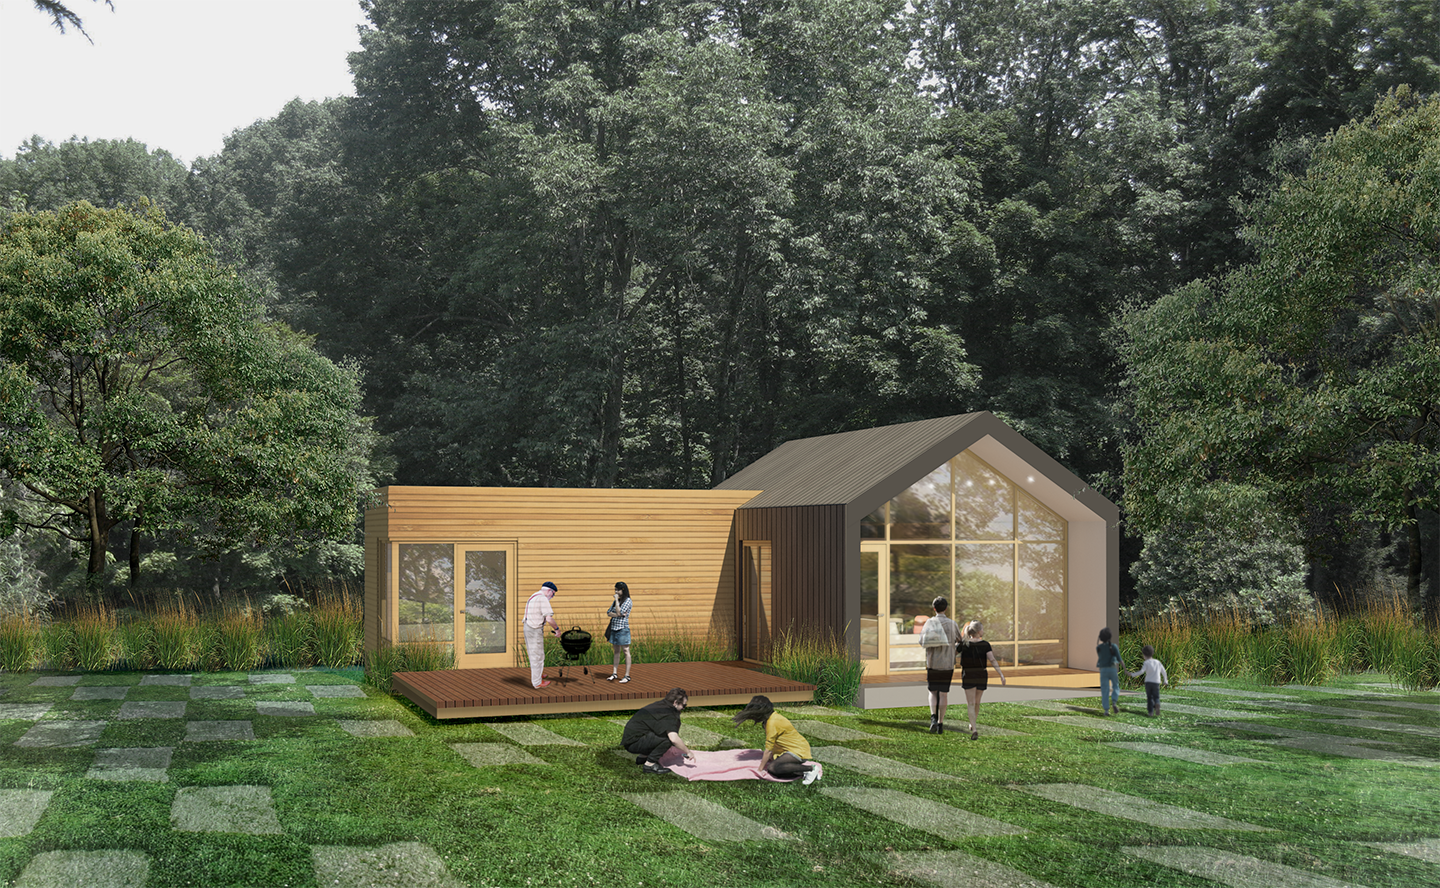
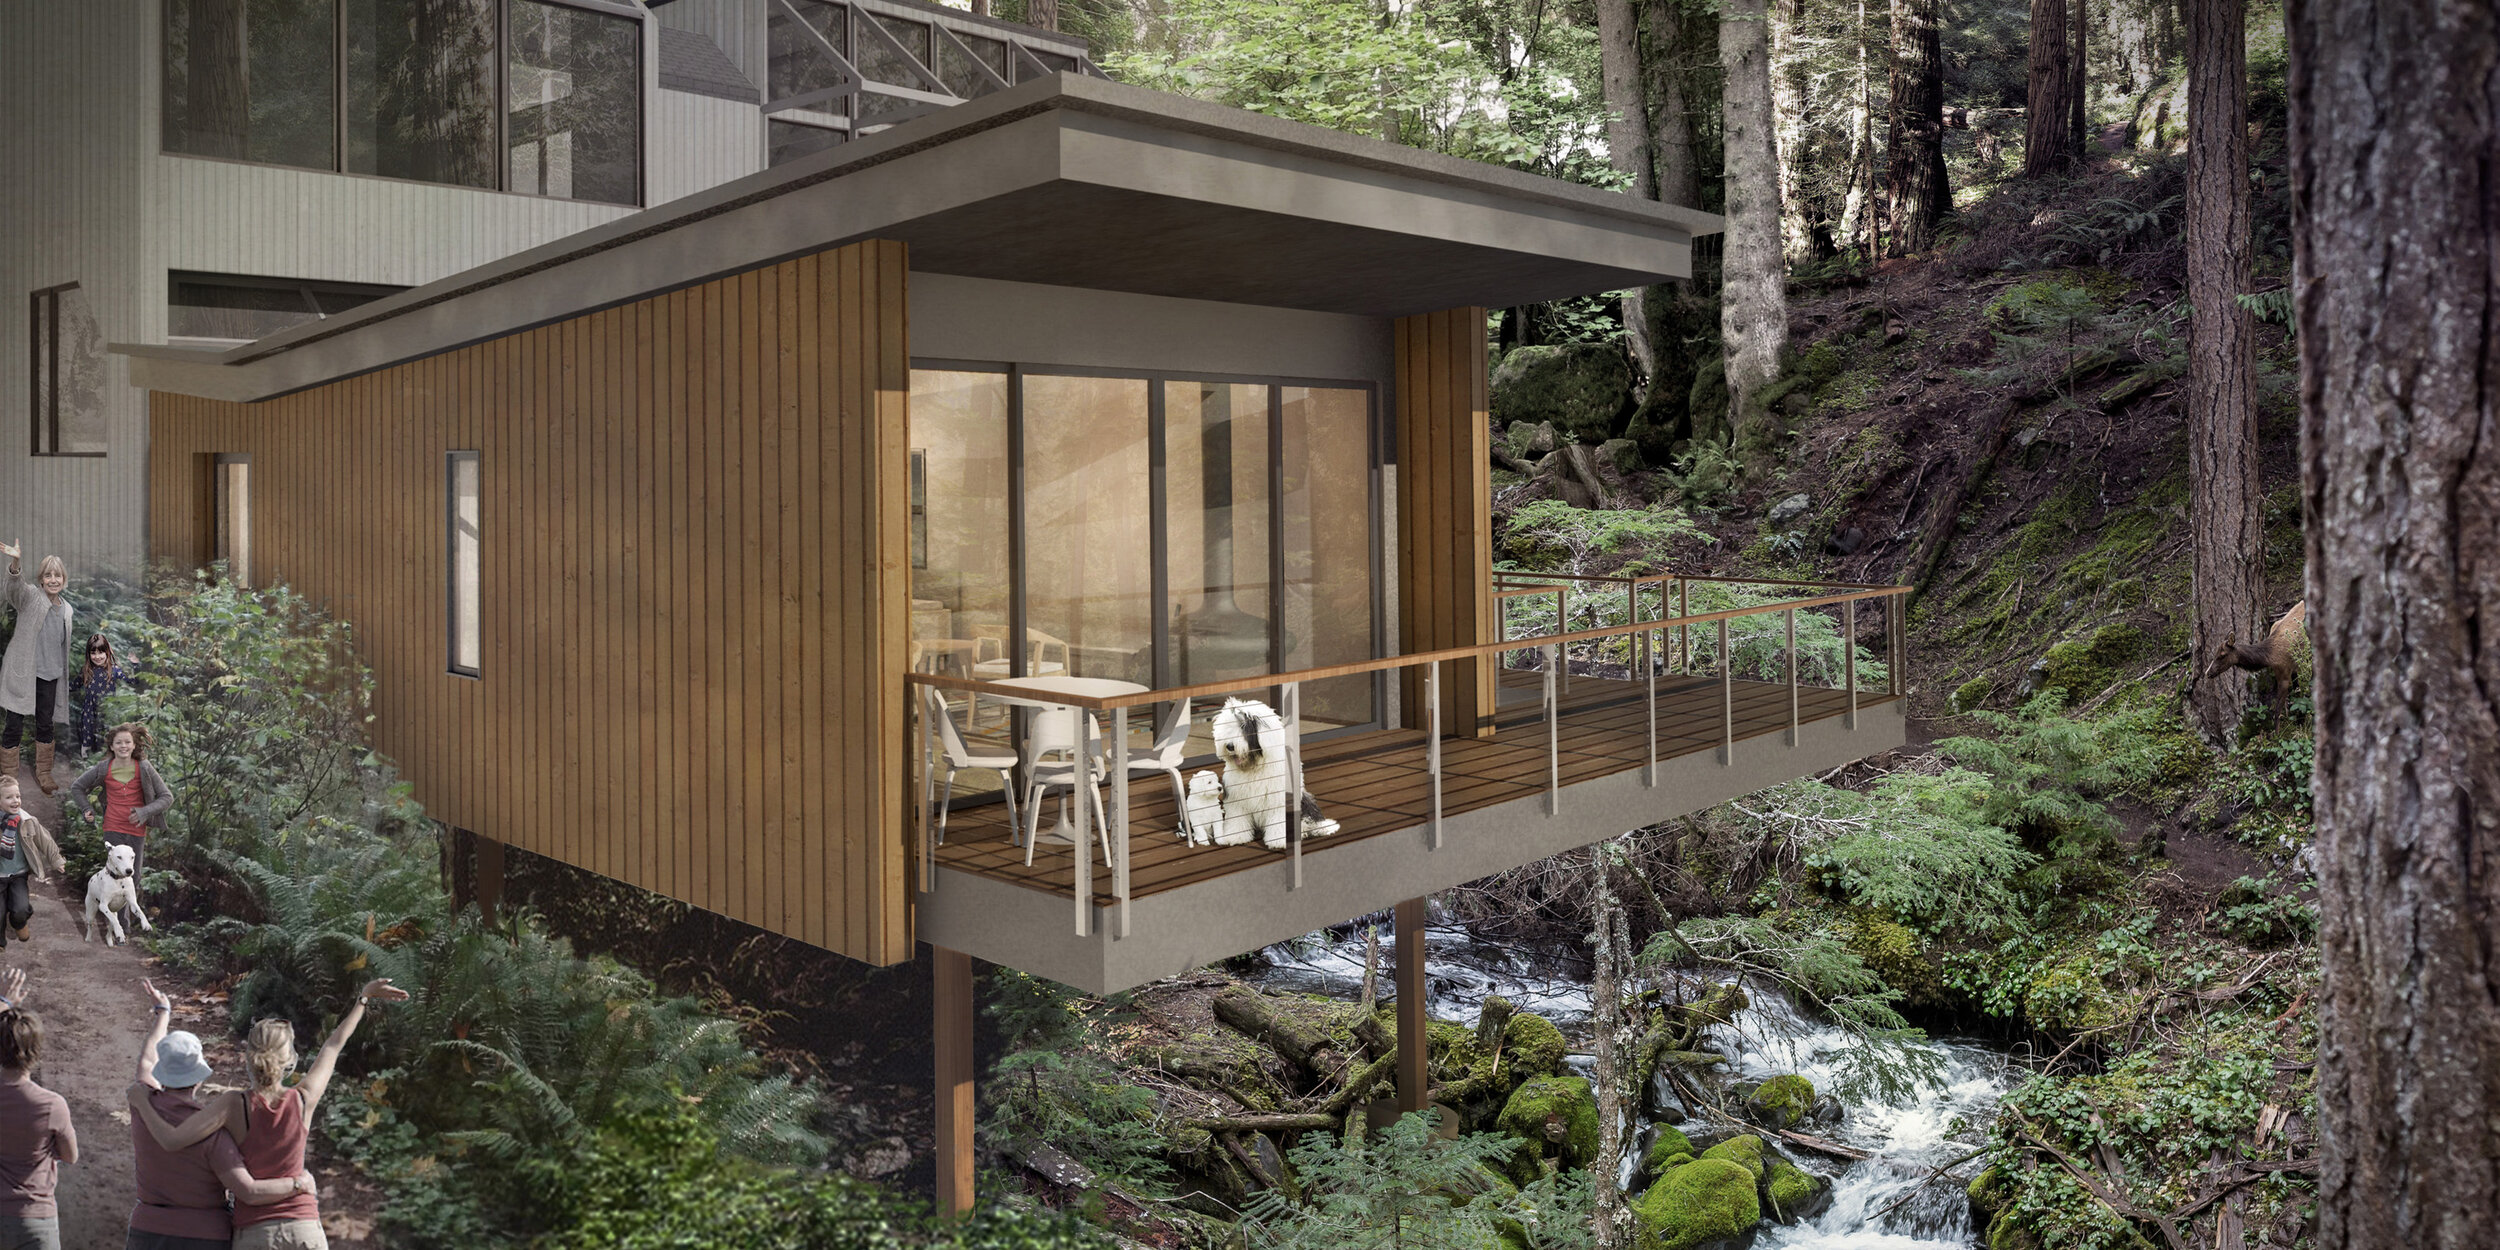
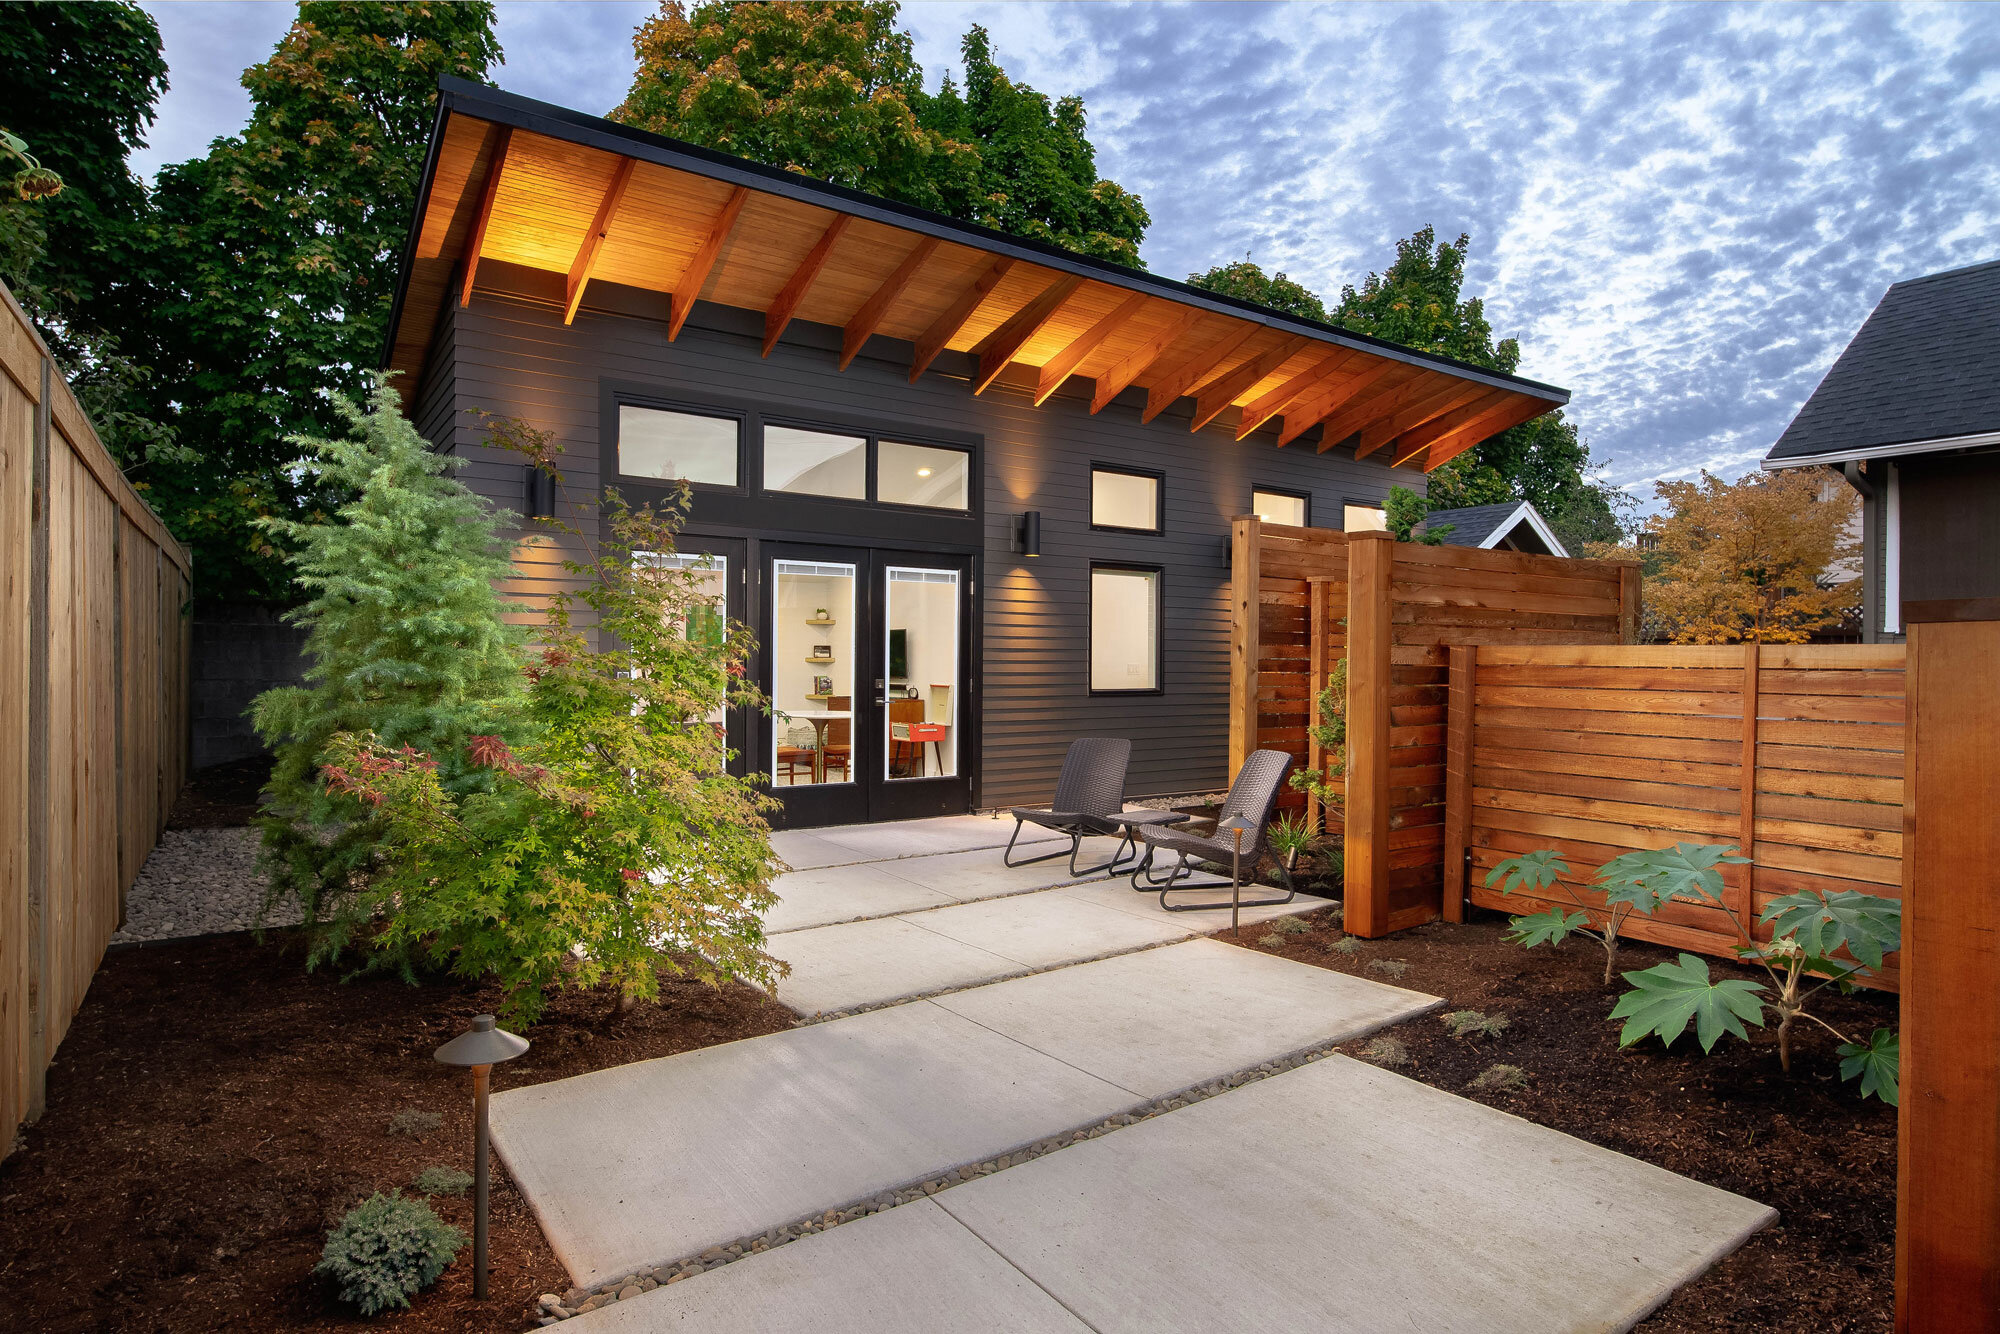
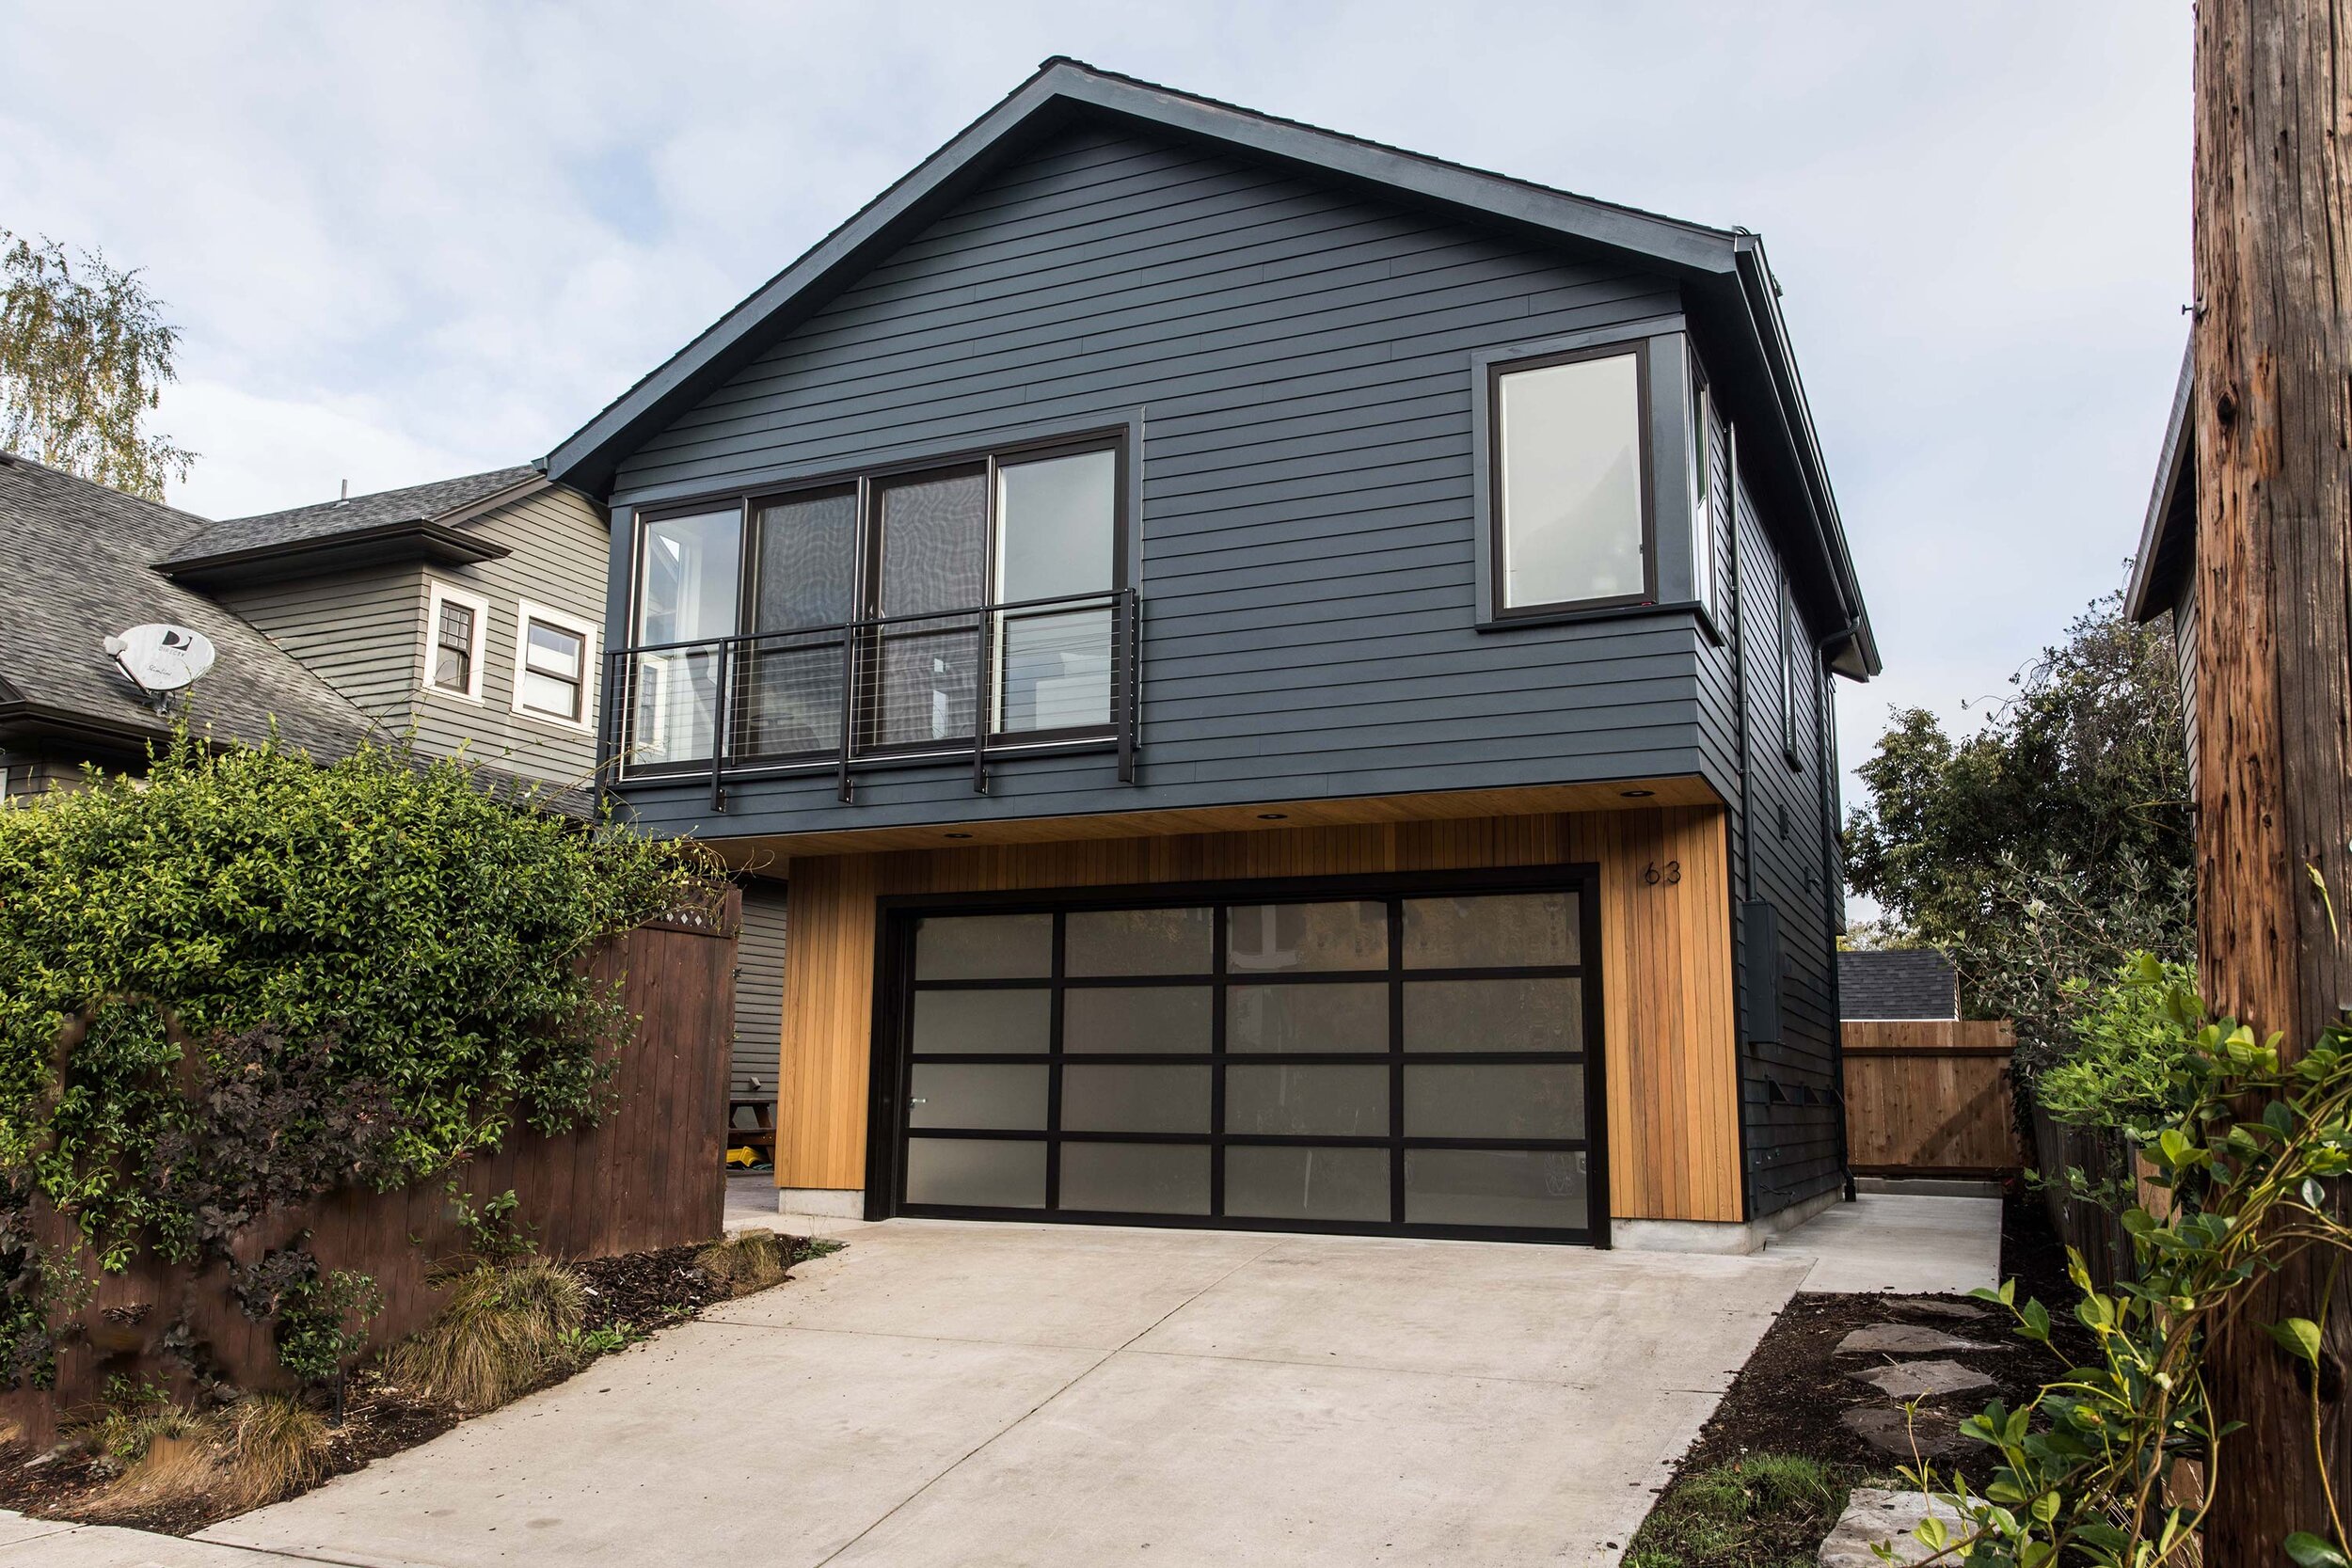
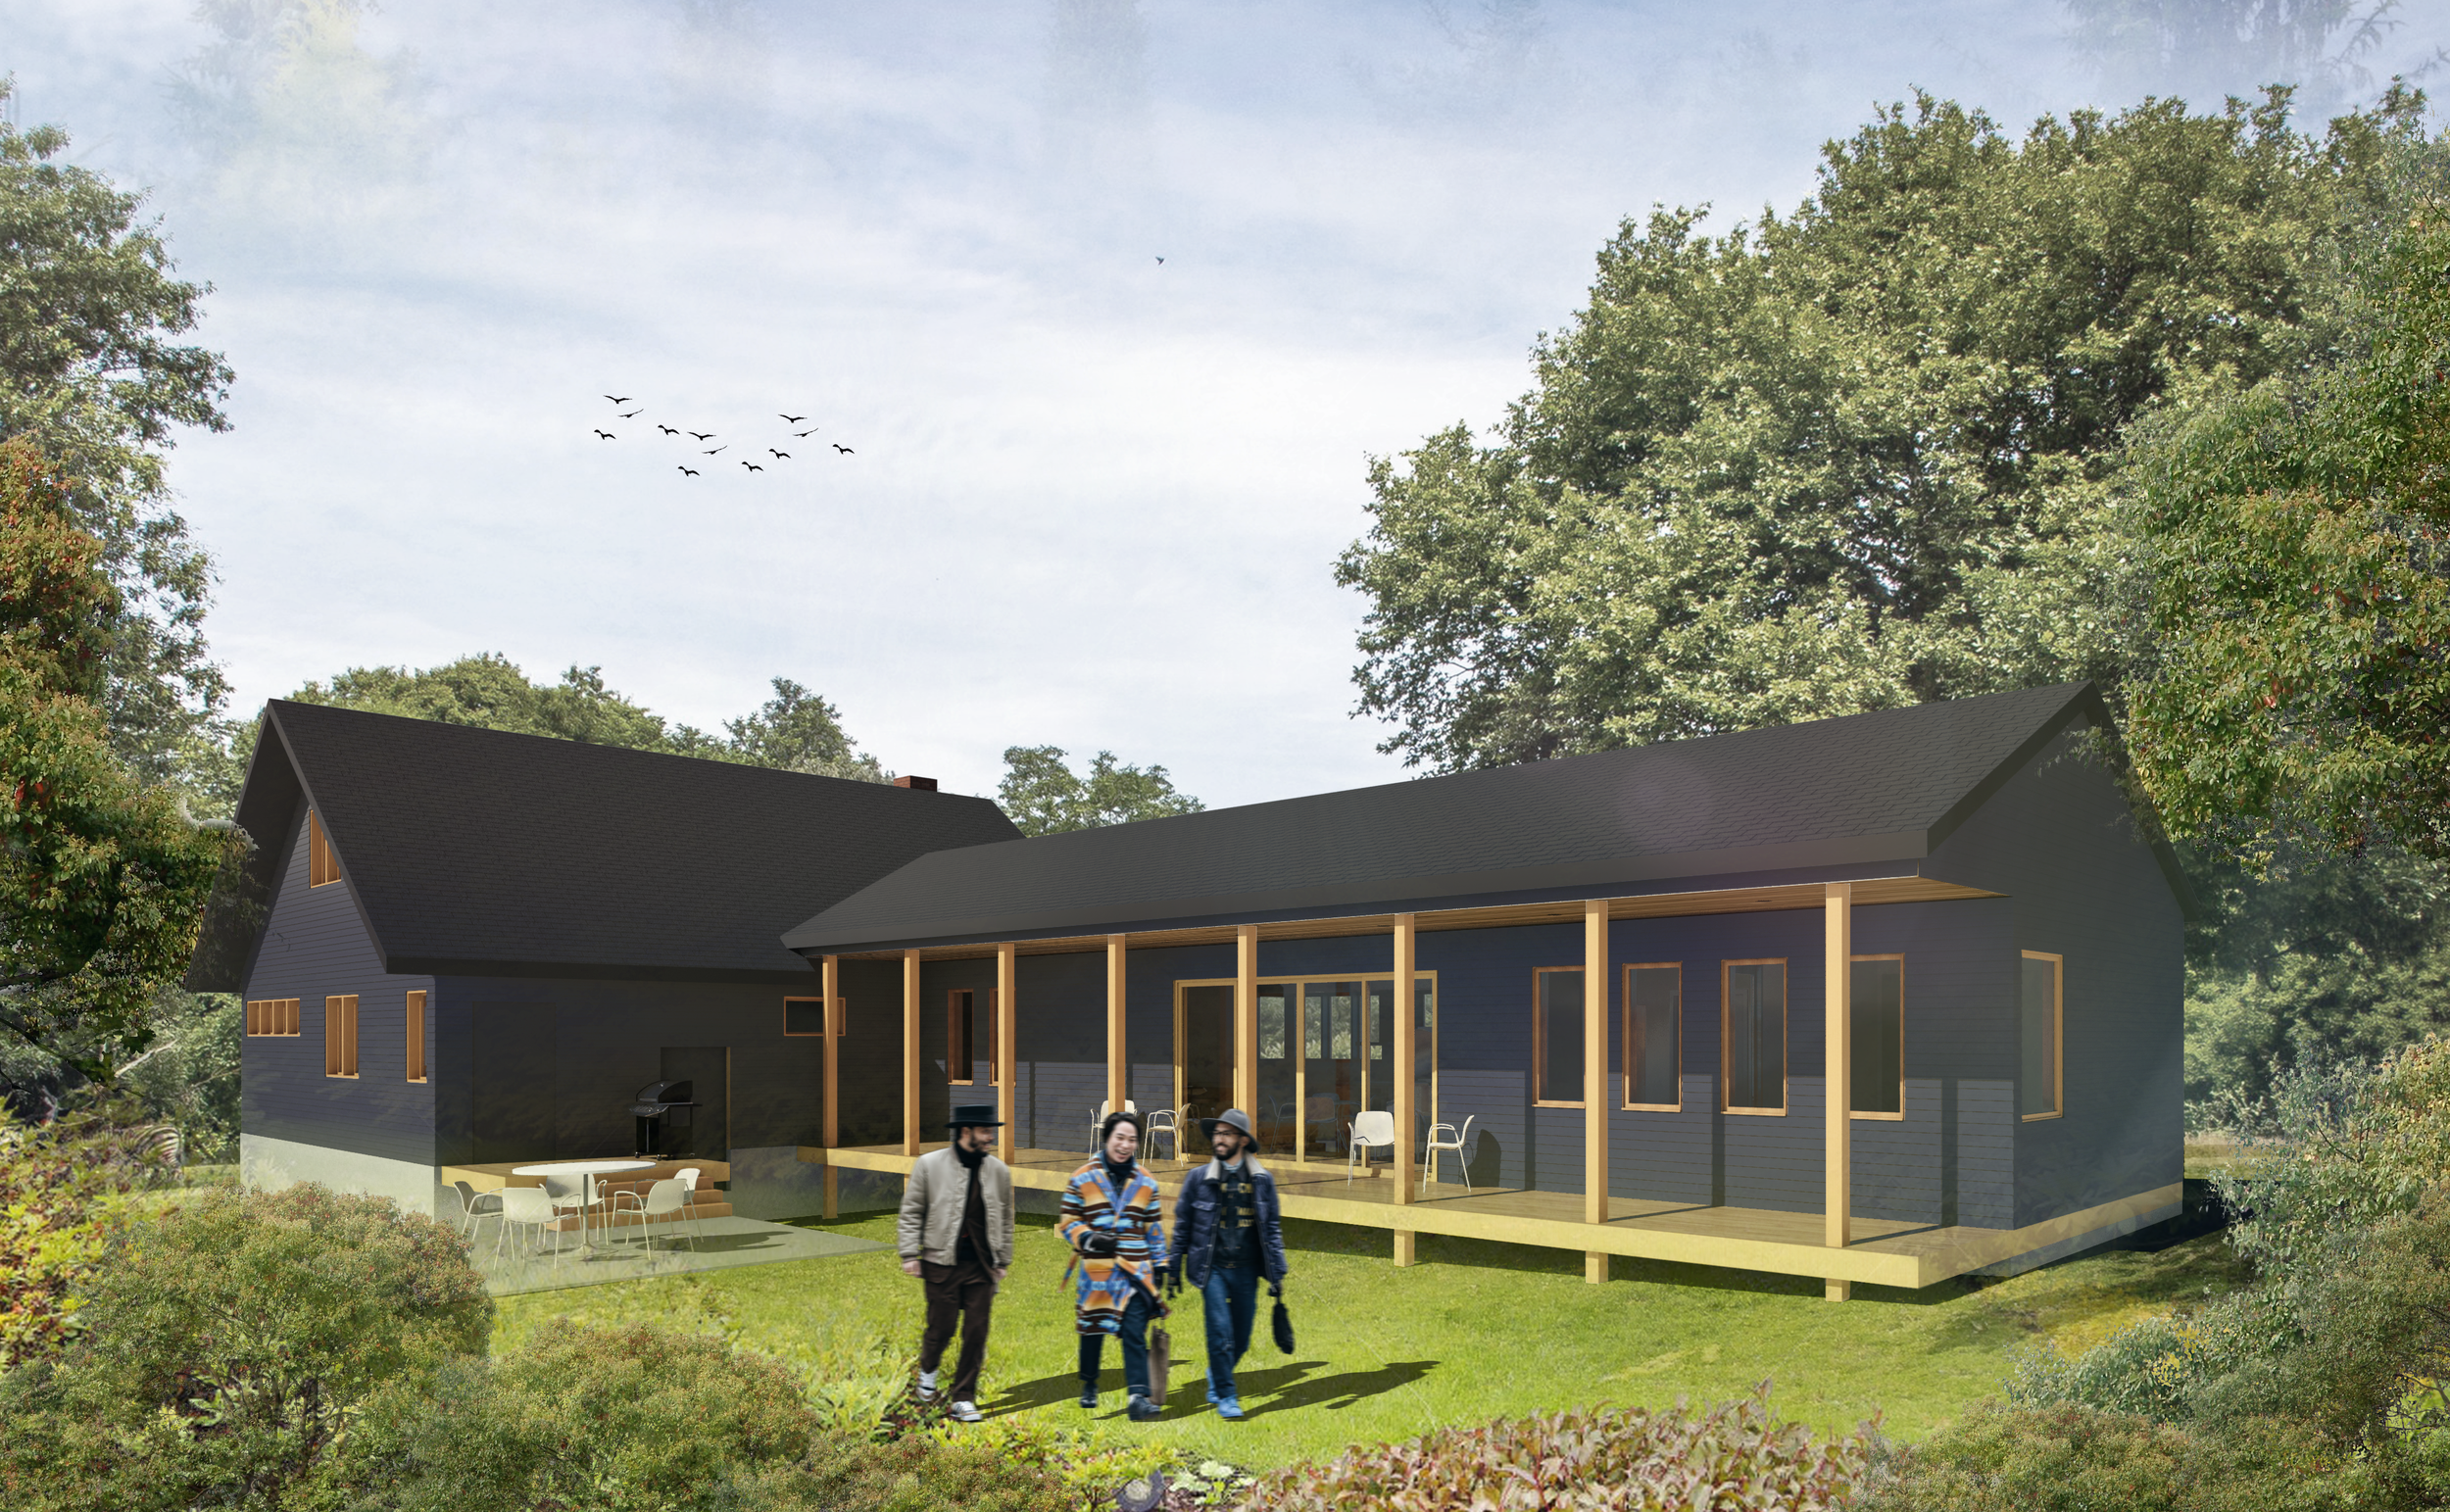
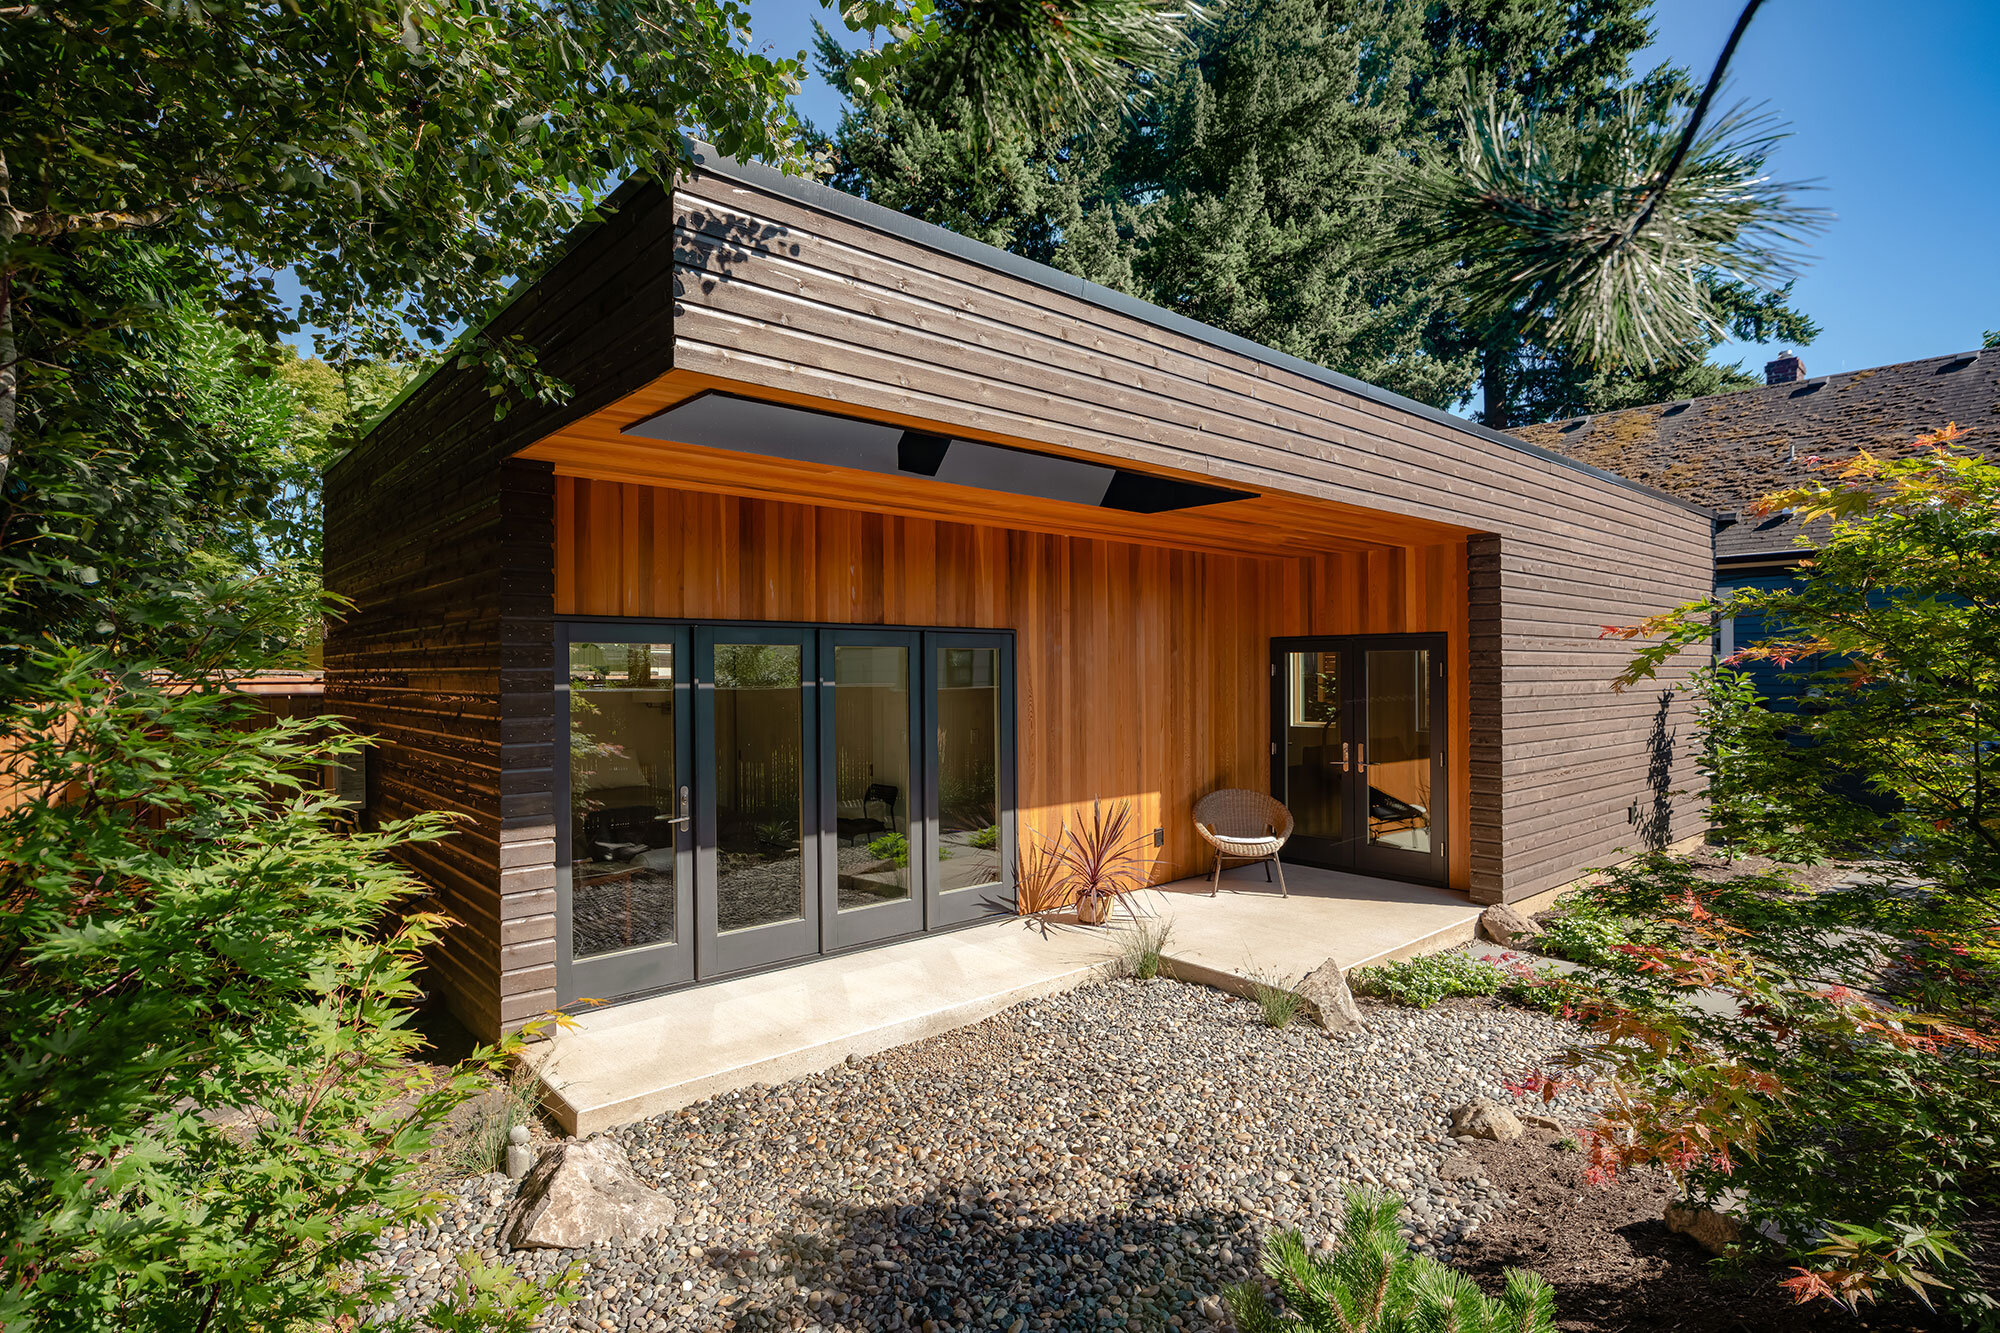
Simple form, natural materials, and large sliding doors are hallmarks of our focus on modern design.

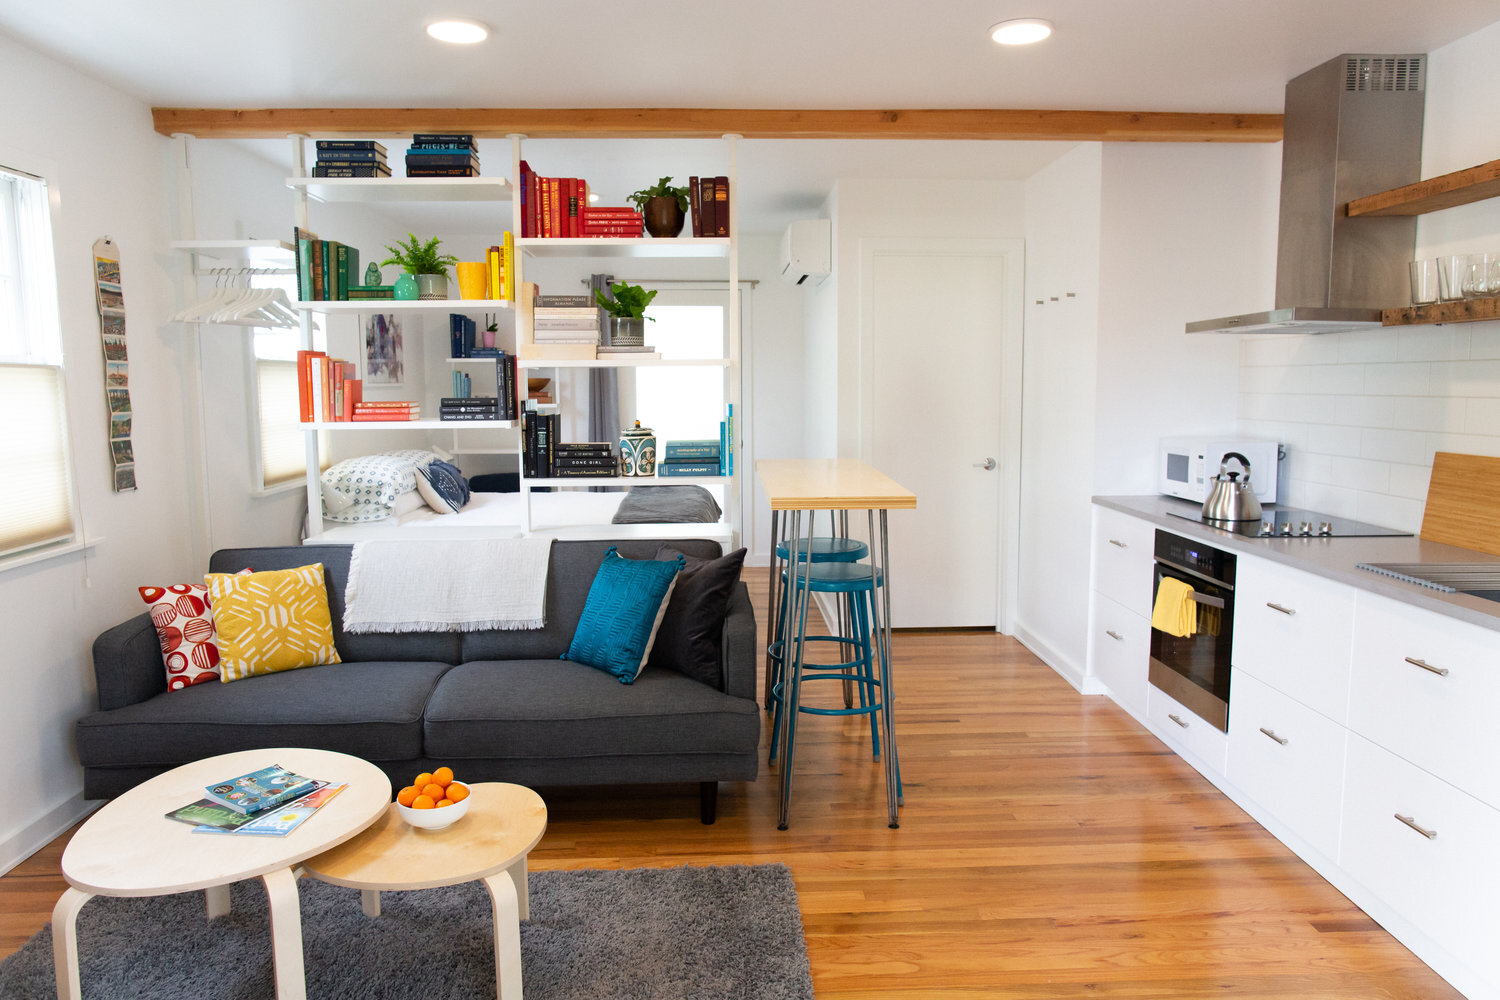
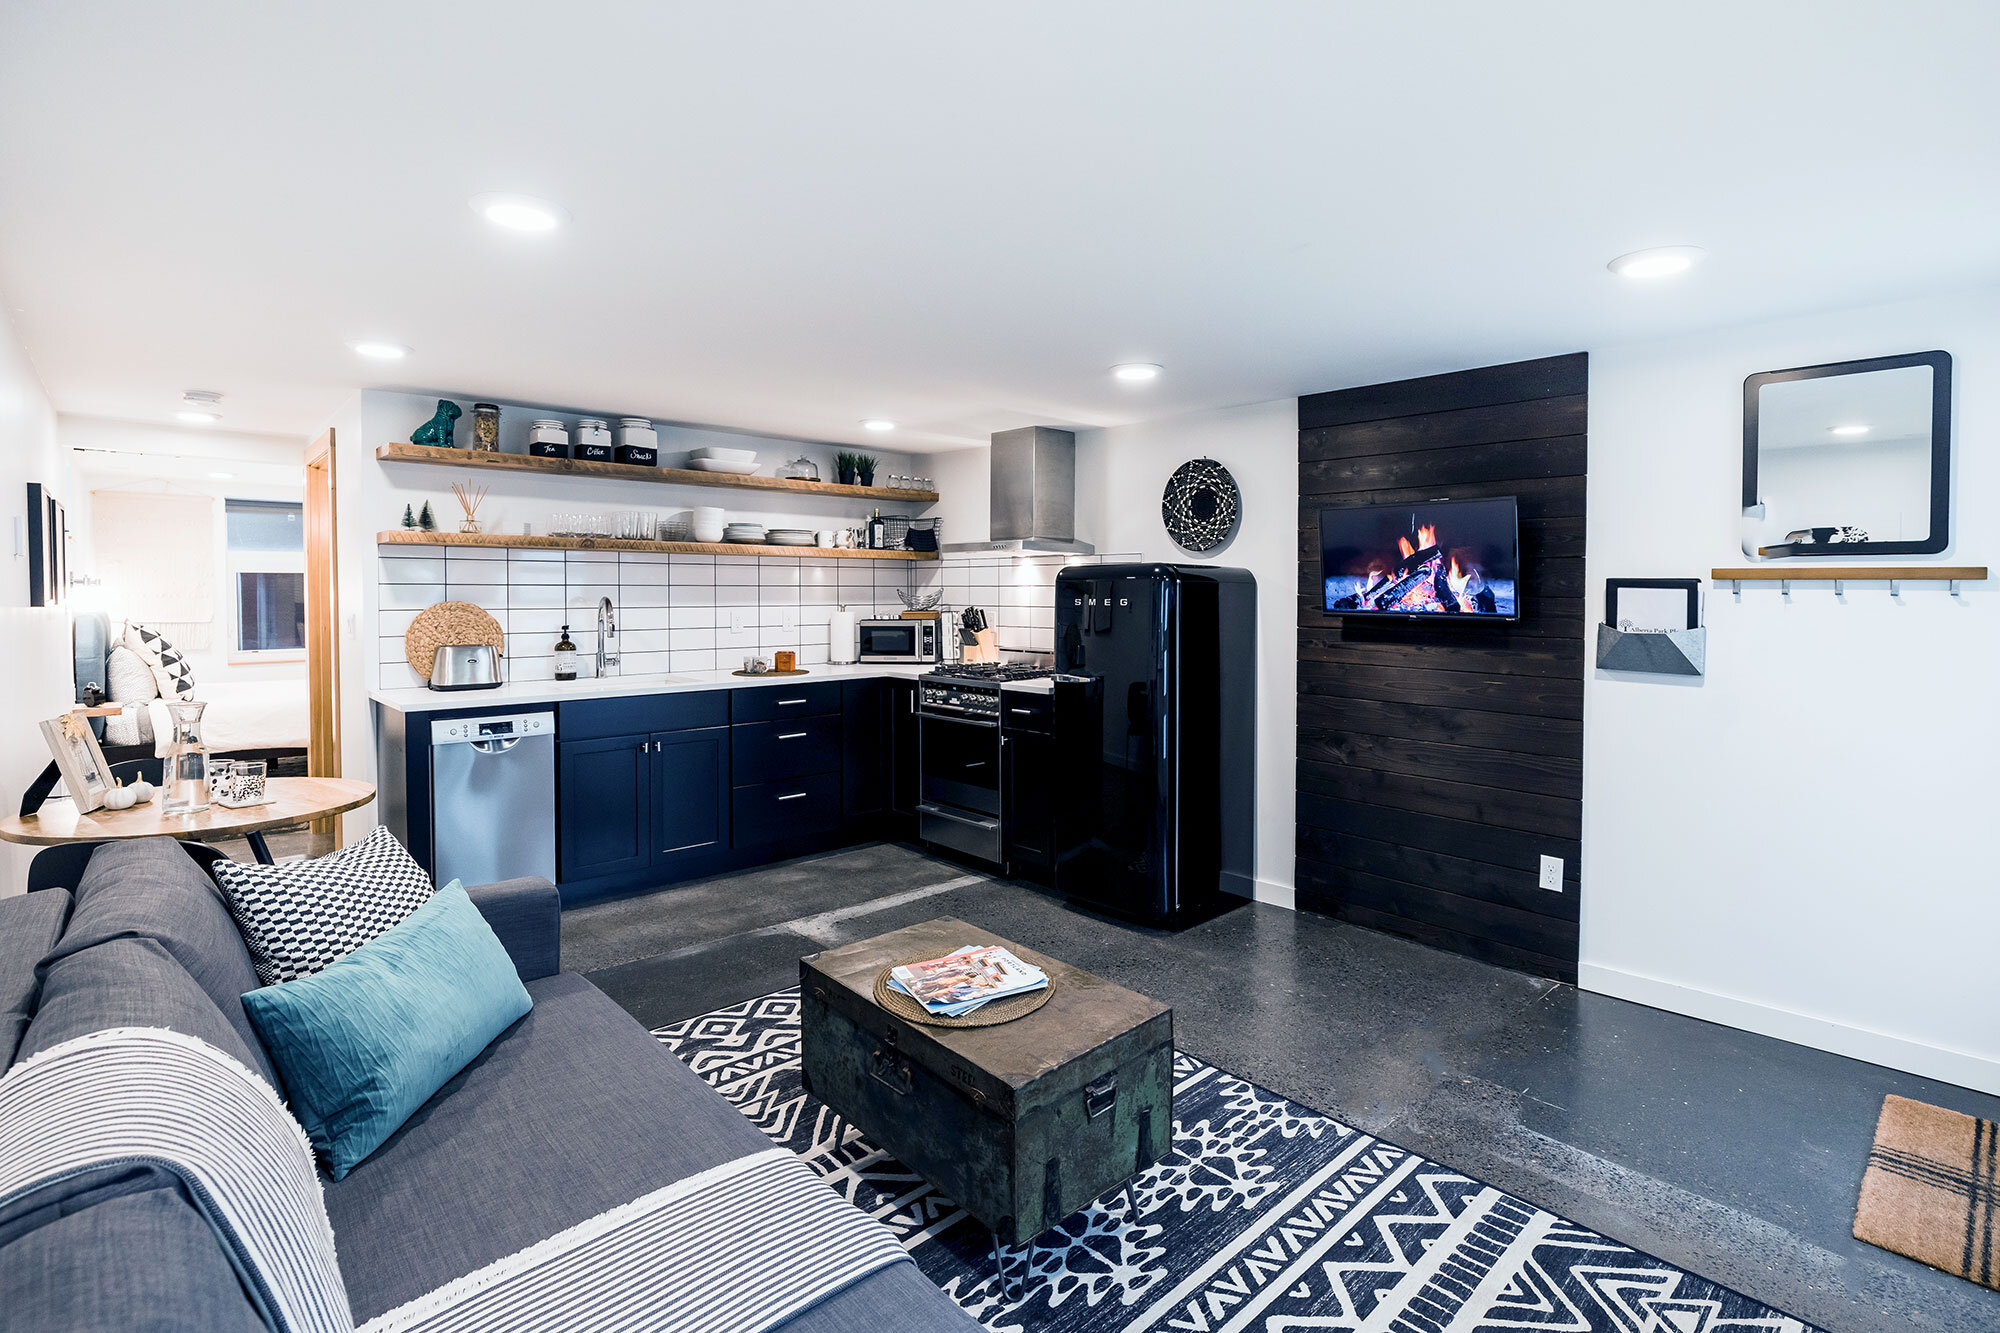
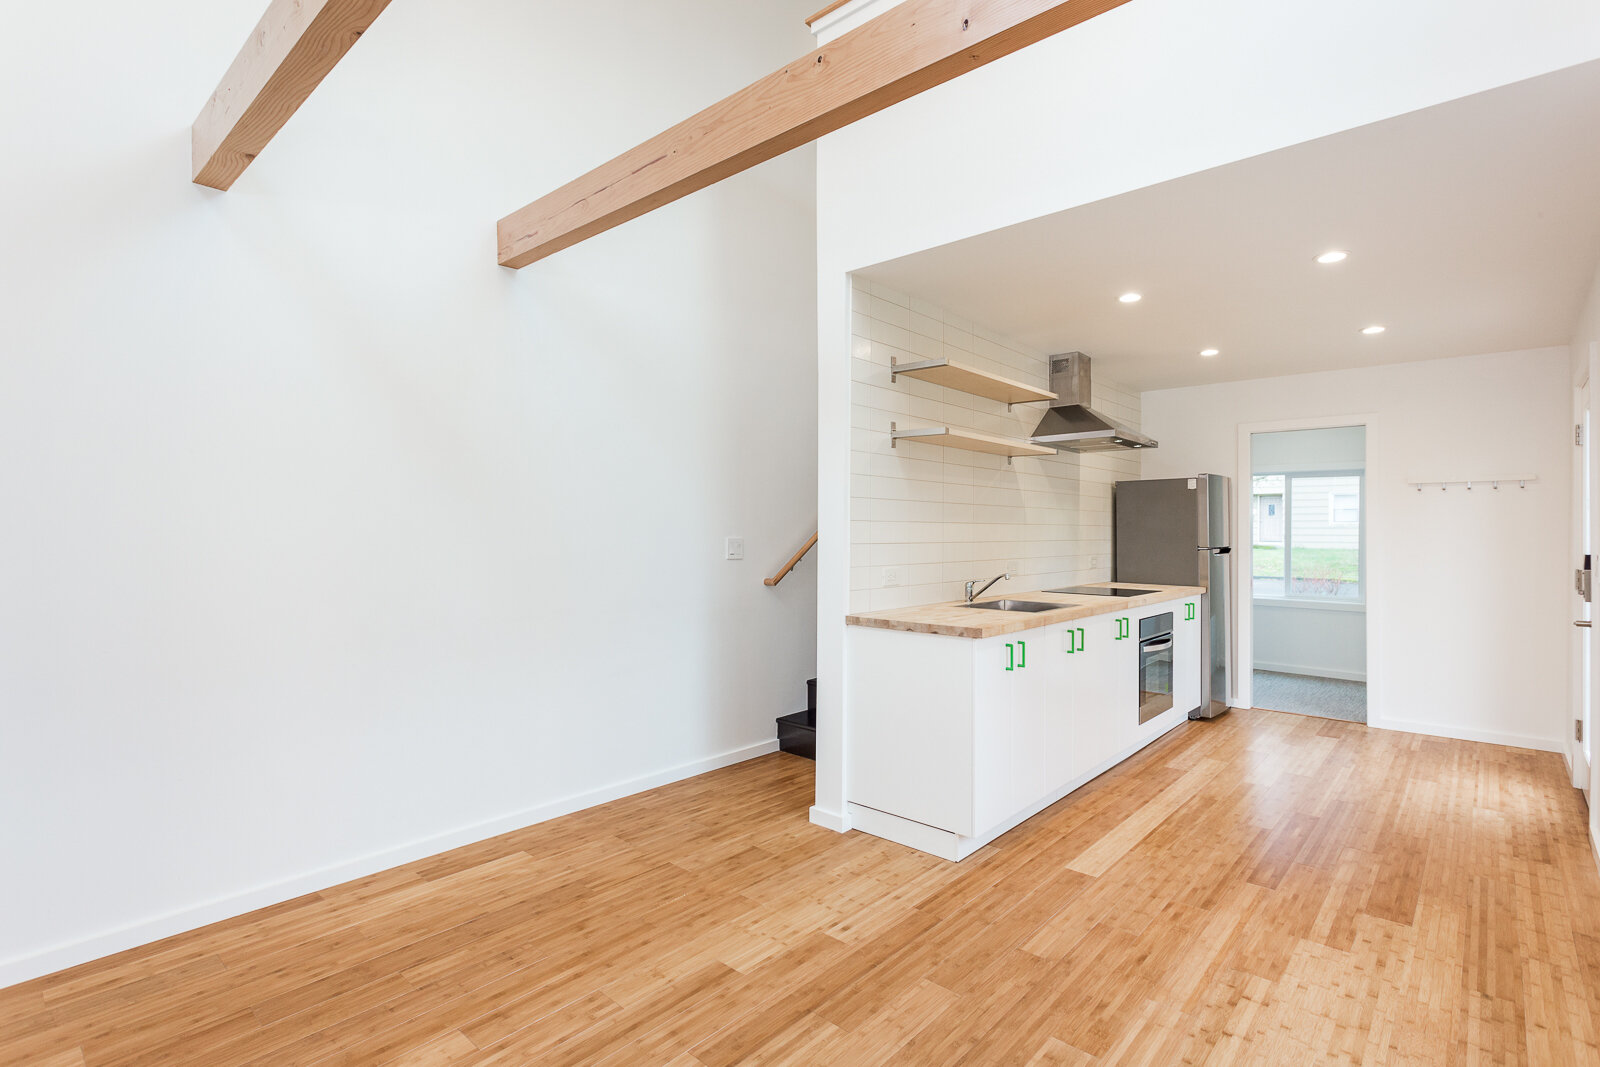
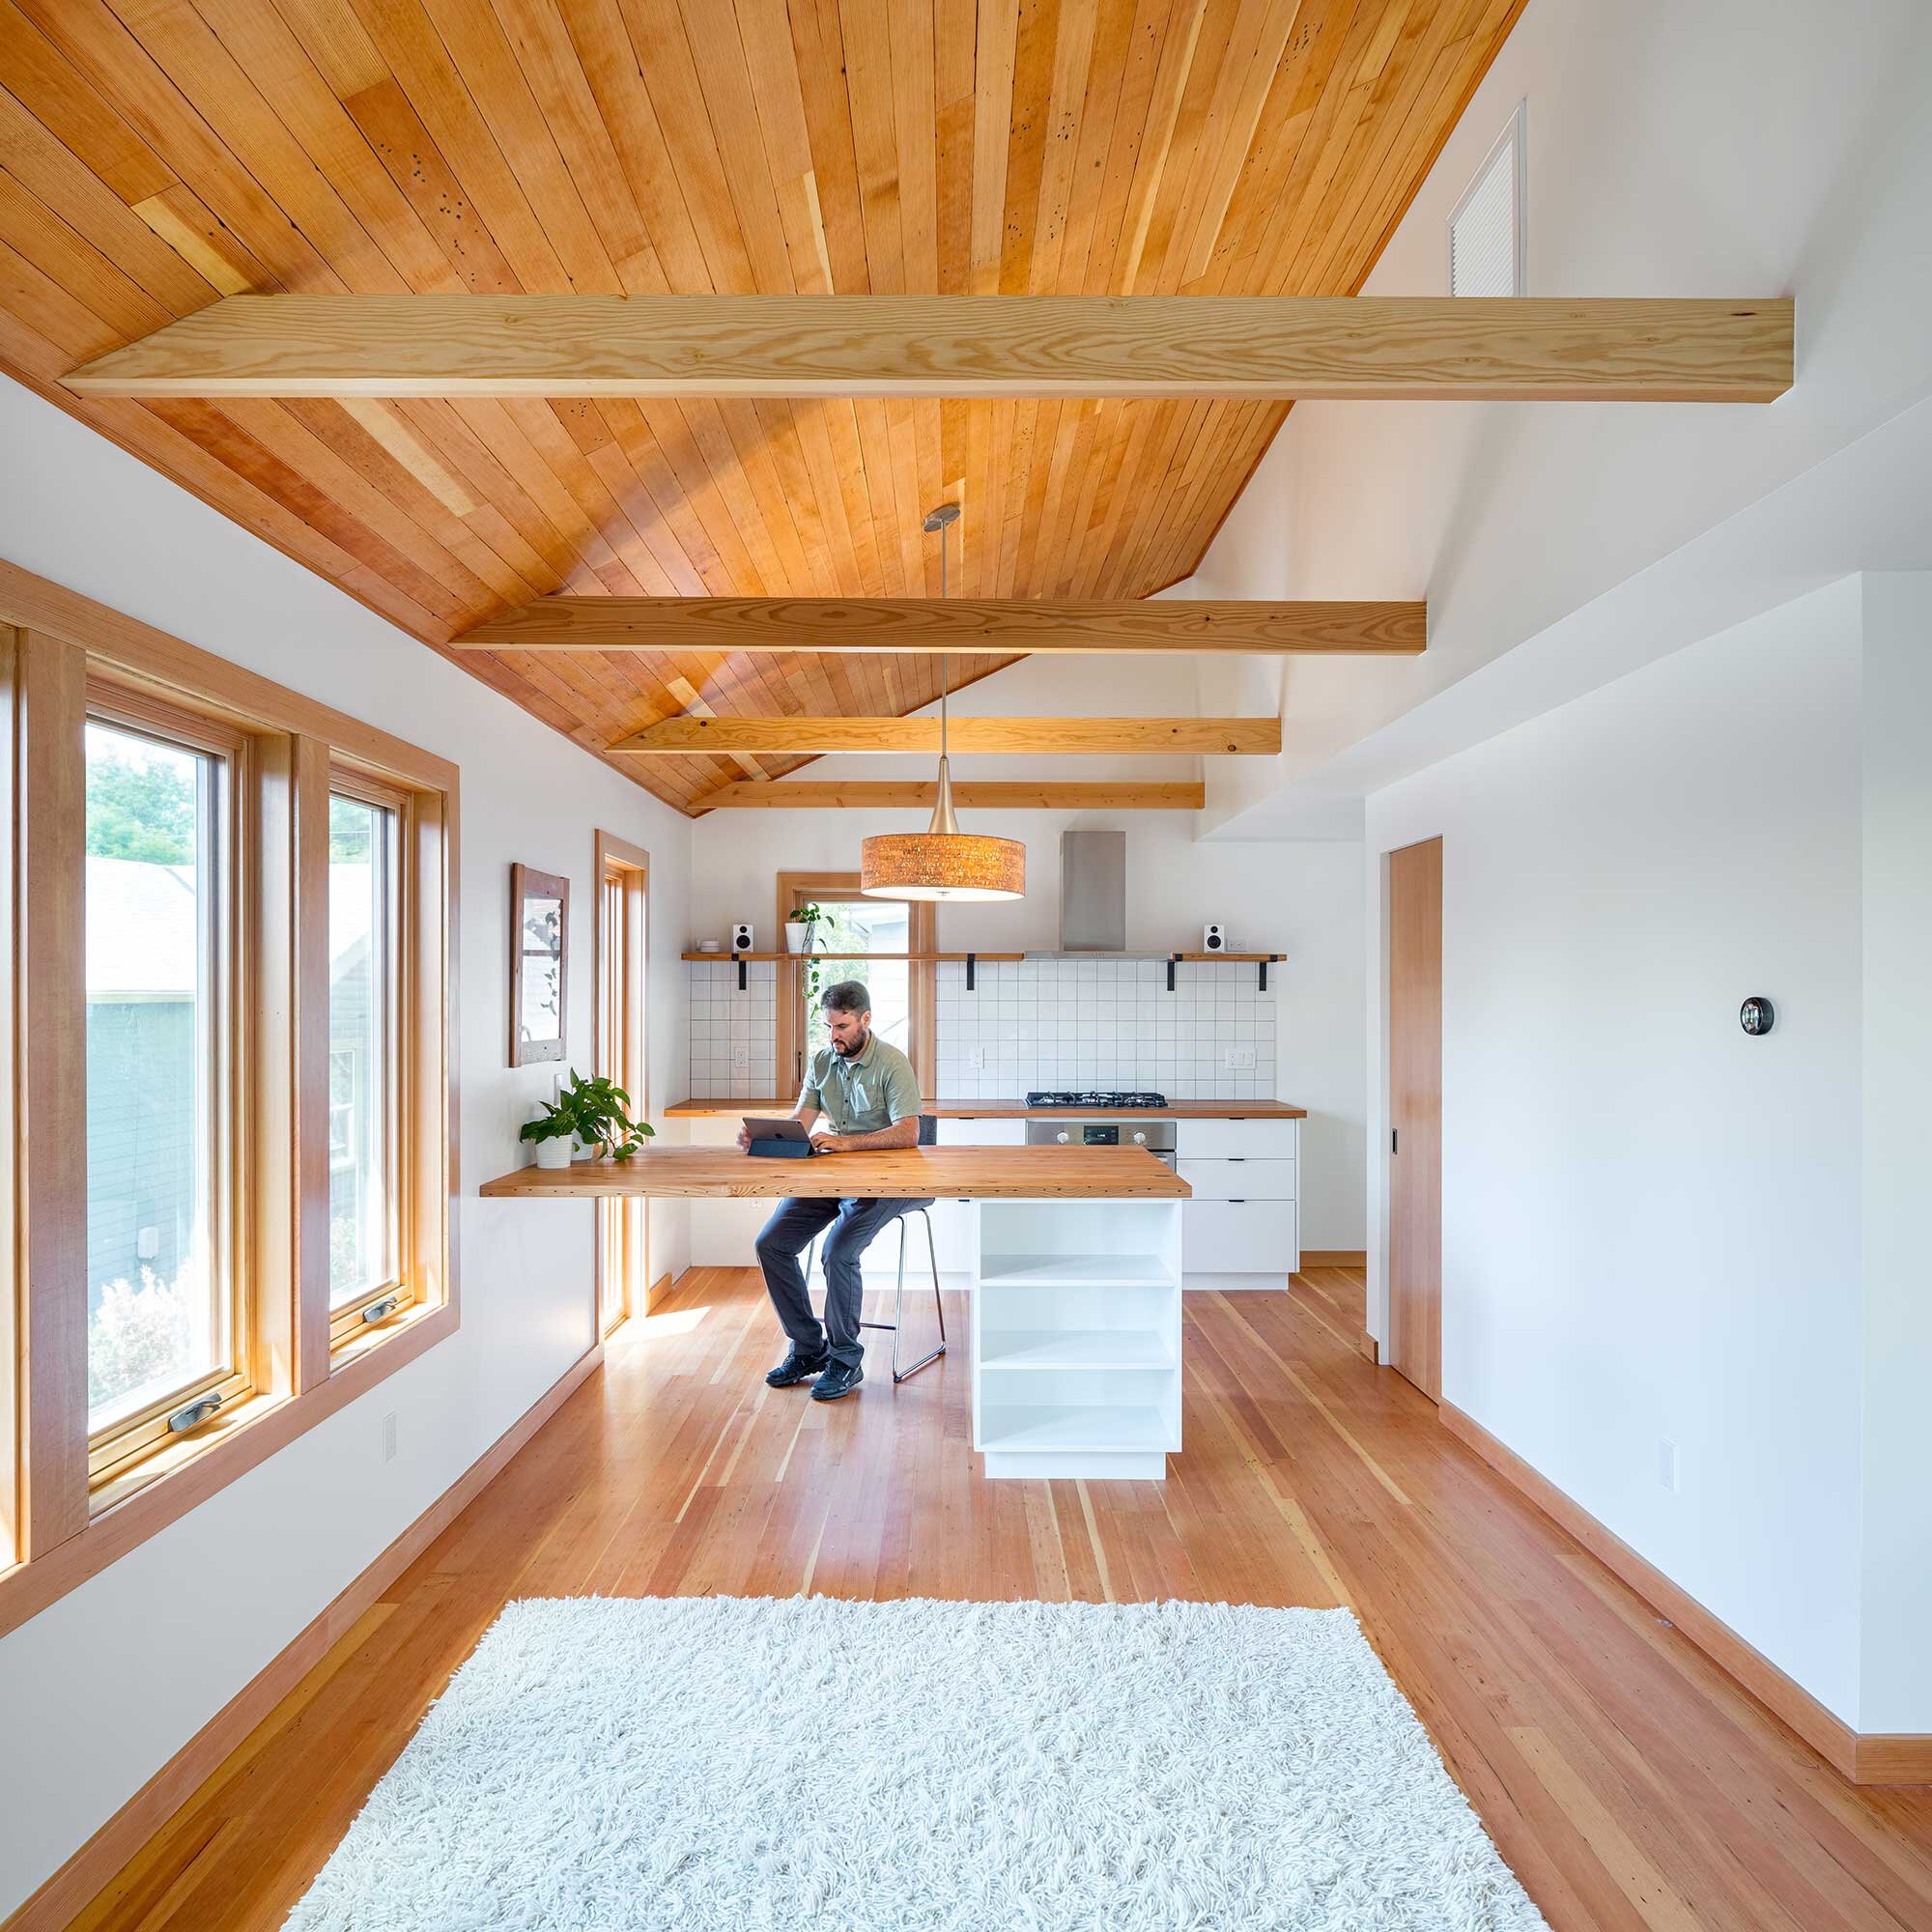
Clean lines, natural materials, and views to the garden define this modern kitchen design.

10 Design Features of Accessible ADU Plans

Designing an accessible ADU is an important consideration for homeowners who want to create a living space that accommodates the needs of all individuals, regardless of mobility or disability. This is especially important when building an ADU for an aging family member, or when downsizing your home as you get older. By incorporating universal design principles and accessibility features into ADU plans, homeowners can create a space that is functional, comfortable, and safe for everyone. In this blog post, we will explore the key design features of accessible ADU plans. We will also highlight some of the benefits of designing an accessible ADU and provide tips for homeowners who are considering this type of project.

10 Design Features of Accessible ADU Plans:

  1. Wide doorways and hallways: Accessible ADUs typically have wider doors and hallways to accommodate wheelchairs and other mobility devices. This also may lead to extra space around furniture to allow for easy movement around the accessory dwelling unit.

  2. No-step entry: A no-step entry eliminates the need for stairs or steps, making it easier for wheelchair users to enter and exit the ADU. This could take the shape of a ramp or landscaping paths that lead up to the ADU level. We also typically look to do slab-on-grade construction for ADUs to keep the floor level as low as possible to allow for easier transitions.

  3. Open floor plan: An open floor plan provides plenty of space for maneuvering a wheelchair or mobility device. This design feature also allows for flexibility in furniture arrangement.

  4. Accessible kitchen: An accessible kitchen typically features countertops at a lower height, ample floor space for turning a wheelchair, and accessible appliances and storage. We used these strategies in the kitchen design for the Modern Japandi ADU - with custom height counters at 32” plus a space on the island without lower cabinets so a wheel chair could roll under the counter.

  5. Accessible bathroom: An accessible bathroom often includes features such as a roll-in shower, grab bars, and a toilet with sufficient clearance on both sides. For the Modern Japandi ADU we did a barrier free shower, extending the floor and wall tiles into the shower area for seamless transition. We also used a special toilet paper roll hanger that doubles as a grab bar. We put extra blocking in the walls of the shower so additional grab bars could be added in the future. We also made sure to specify a shower head that had a hand shower attachment which is helpful when bathing with limited mobility.

  6. Lever handles: Lever handles on doors, cabinets, and faucets are easier to operate than traditional knobs and handles, making them ideal for individuals with limited hand strength or mobility.

  7. Non-slip flooring: Non-slip flooring can help prevent slips and falls, which can be especially dangerous for individuals with mobility impairments. We carefully select tiles and other flooring materials that won’t get slippery even when wet.

  8. Adequate lighting: Adequate lighting is important for individuals with low vision or vision impairments. A well-lit ADU can also help prevent falls and accidents. WIth ample light fixtures and dimming switches we aim to give a wide range of lighting options that can be adjusted based on the time of day or lighting needs for specific activities.

  9. Universal design: Universal design principles aim to create spaces that are accessible and usable by everyone, regardless of age or ability. Accessible ADUs often incorporate universal design features to make them more functional and appealing to a wider range of users.

  10. Single Floor ADUs: this one may be obvious but many of our ADUs are designed as a single level to allow them to be more accessible for all. Stairs are a big barrier and a risk when getting older. Making sure there is at least one bedroom and one full bathroom on the main level of the ADU, or having the entire ADU on one level makes it possible to be converted into an accessible ADU that is ideal for aging-in-place.

By incorporating these design features into accessible ADU plans, homeowners can create a living space that is functional, comfortable, and safe for individuals with disabilities or mobility impairments. Accessible ADUs can also provide a valuable solution for families seeking a home that accommodates their unique needs.

We have worked with clients on a range of accessible ADU designs and have translated our lessons learned into many of our available ADU plans for sale. Check out our shop for the single level ADUs. We can also work with you to make adjustments to one of our designs or custom design an accessible ADU that will meet your needs.

This bathroom was designed specifically for accessibility. The room has extra width allowing for the turning radius of a wheel chair. The toilet paper holder is designed to double as a grab bar to assis with getting on and off the toilet. The shower is barrier free with the tile seamlessly flowing into the bathing space with a linear drain across the back. The shower is equipped with a hand shower making bathing easier from a seated position.

Prefab ADUs vs Pre Designed ADUs vs Custom Designed and Built ADU

You may be thinking about adding an ADU to your property and considering the best option to achieve your goals. There are three primary ways to deliver an ADU project: Prefabricated ADUs, Pre Designed ADUs, and Custom Designed ADUs. All have their strengths and weaknesses which we discuss below.

Prefab ADU

Before we discuss the strengths and weaknesses of this approach lets quickly touch on the definition of Prefab vs Modular and other common terms. Prefabricated typically refers to projects where all, or parts of the building are manufactured in a factory and shipped to the site to be assembled. This could be wall panels, roof trusses, and other specific building components, or could be the whole unit itself. Modular construction is typically referring to projects where the whole unit is made off site and shipped as a single object and the placed on a foundation. Sometimes multiple modules are combined together to complete the structure. For example, when you are driving on the highway and see those extra wide load trucks with homes on the back, that would be a modular home. If you see a truck that is flat packed with wall panels, that would be prefabricated. For this article we lump these two approaches together in this prefab ADU category.

The main advantage to prefab is a potentially faster schedule, and that build quality could be better within a factory where they don’t have to deal with weather and other site conditions and where machines and better tools could allow for more accurate construction. Many prefab companies will state that their builds are higher quality with smaller tolerances when compared to site build ADUs.

The other advantage is that often these can be built ahead of time and sold as a product, meaning the length of time for the construction can be dramatically cut down. If the unit is already built and just needs to be shipped to site, all that would be needed is site specific work like utilities, foundations, etc. at which point the finished unit could be craned into place and installed in a couple of days.

While the time argument is compelling, not many of the prefab companies have inventory of units sitting around waiting to be sold. Most build to order and have long lead times as demand increases and labor is hard to come by. Often it takes just as long to order and receive a prefabricated ADU as it does to custom build one on site. Hopefully this is a short term challenge and over time prefabricated units will become available in a shorter timeframe. When this is the case it will be a very compelling argument to choose a prefabricated ADU.

There are a couple downsides to Prefabricated ADUs. The primary one is that your choices for the design is limited. These ADU projects are predesigned and manufactured so you don’t have the ability to adjust the design, select different materials, and make other revisions that you may get to make if you were going a more custom route. The other challenge is that these projects show up to site as large objects that need to be moved into place, meaning often you need a crane and other large equipment to help assemble the ADU. The drawback here is that there could be site conditions that prevent prefabricated units from being viable at all. Overhead power lines, trees, steeply sloped sites, and other conditions may make your property unable to accommodate a prefabricated unit.

It is important to check with the company and share details about your property to verify if they can actually install their product on your property, and what additional installation costs may be required.

The other issue to look carefully at before moving in this direction is the cost. It is important to understand the base cost of the prefabricated parts of the project, with the additional cost required for the site specific work. You may see a prefab ADU being advertised for say $200,000 but typically that wouldn’t include things like excavation, concrete foundation work, utility installation, complications with access to the site, landscaping and other costs that you would need to incur. When comparing prices make sure you are comparing the total project costs and not just the cost of the prefabricated ADU itself. These additional costs could add thousands of dollars and maybe even $100,000 or more depending on the specifics of your property. I’m not trying to scare anyone away from exploring prefabricated accessory dwelling unit options, but know that the sticker price on a website may not be the full project cost to you.

Pre Designed ADU

Where Prefab ADUs are a fully built unit shipped and installed on site, Pre-designed ADUs are where you are simply purchasing the design drawings for an ADU project. Typically this could be a PDF file, a CAD file, or perhaps a Sketchup or BIM file like Revit or ArchiCAD. Most likely it would be a PDF of the ADU plans that you could then print, share with a local designer or engineer to make revisions, and submit for permit review at your local building department.

There are many advantages to starting your ADU project with a pre-designed plan set. It can save a significant amount of time when compared to going with a custom designed ADU project. Instead of working with a designer to start a new design from scratch you can pick a design that you like and meets your project goals and then just make some small revisions to get it ready for permit approval. We find that starting with ADU plans can save approximately 4-5 months of time.

When you save time, you also save money. Hiring a designer or architect to design a custom ADU should cost about 10% of the project budget. For a nice $300,000 ADU that would mean design fees of around $30,000. Although, this can be great value when the custom designed ADU is specific to your property, aesthetic taste, and project goals, for those who can’t afford this premium price, starting with a pre-design accessory dwelling unit can cut this fee significantly. We sell our plans for around $1,000 and often make small revisions for another $1,000 to $2,000 for our clients. You can then take the drawings to a structural engineer to complete their work for another few thousand dollars. Alltogether you can probably get a permit ready set of drawings for close to $5,000 or less. This is much more affordable for most people than going with the custom route. All of our plans are designed by talented architects and designers who specialize in ADUs, and many are award winning designs, meaning you are getting a high-quality design for a fraction of the cost of a custom ADU.

Another advantage to a pre-designed ADU is that you can get construction cost estimates done pretty early in the project. If you have engaged a general contractor already, they can probably give a good estimate of what a design would cost by analyzing the ADU design drawings and/or seeing images of other built projects with the same design. You can also ask the company selling the plans about cost estimates from other builds. Having this cost information up front can help you develop a project budget and know whether the ADU will be a good investment.

This all being said, there are many reasons why a custom ADU design could be the best approach for your project. We will explore that in the next section.

Custom Design and Built ADU

To be honest, if money wasn’t a barrier, I would recommend that everyone go with a custom designed ADU project. Hiring a skillful designer to craft an ADU design that is specific to your goals, taste, and property can give you the best result. However, it is never the case that money isn’t a factor in people’s decisions.

Custom ADU design is definitely the most expensive option of the three. It also probably takes the longest as you have to work with the designer to develop design ideas, work through iterations, and ultimately land on the best solution for the project. We typically estimate that the design process takes about 5-6 months for most of our clients. This could be longer or shorter depending on your ability to make decisions, the size and complexity of the project, and the local jurisdiction and their rules and regulations. Often there are city requirements that require additional work or bringing on other consultants that can add time and cost to the design phase. .

The other aspect of custom designed ADUs is that often people who go this route want something more unique or higher end. Even when they say they are on a tight budget, in our experience people tend to make decisions or select designs or materials that can push up the cost. My opinion is that you get what you pay for and often these decisions lead to better quality projects that are beautiful spaces to live. But it is important to consider that once you start designing, the sky is the limit and you may talk yourself into doing something higher end than what you started out imagining. This can be both a pro and a con to going with a custom designed accessory dwelling unit.

Advantages start with designing something specific to your property. Taking cues from the main house, the site topography, solar orientation, views, landscape features, neighborhood context, privacy concerns, and the taste of the owner means that a custom design project can really perform better than most other options. It allows you to make adjustments that mean the ADU can fit seamlessly into the surroundings and compliment what is already there. You can’t really get this level of site-specific advantages when going with a prefabricated ADU or a pre-designed ADU. This is also why we tend to not recommend garage conversions very often. They just limit what is possible by too much, meaning the end result is not ideal for what you could get with a fully custom, ground up construction ADU.

If you can afford it, we would highly recommend this approach. If budget is tight, that is when you should definitely start exploring the other options described above.

If you want to learn more about our custom design services, please contact us and tell us more about your project goals.

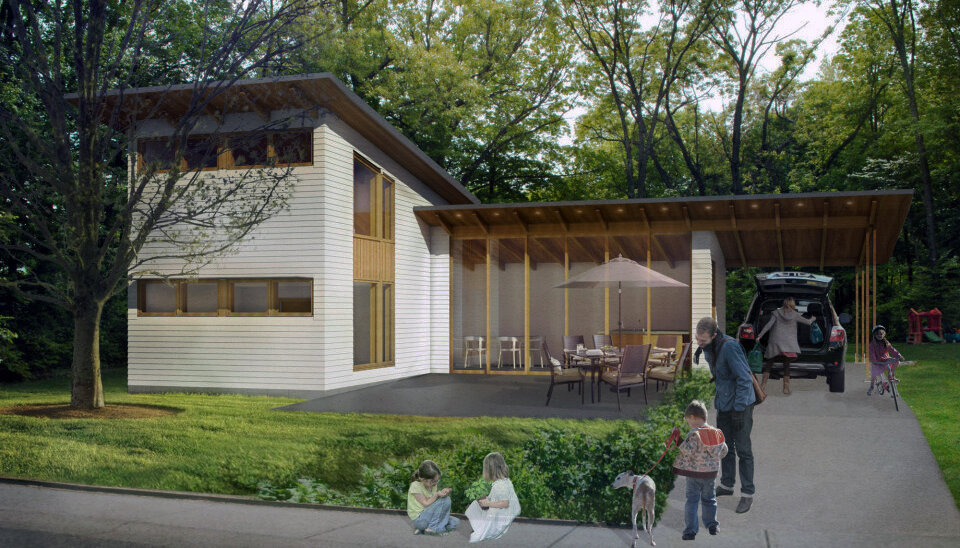
One of our favorite designs is this split level ADU that stacks two bedrooms while providing a light filled living space with open kitchen, living, and dining areas. The large floor to ceiling glass provides great views and natural light to flood the interior, making the smaller sized ADU feel much larger.

What Are The Design Phases For An ADU Project?

The design phases for an ADU (accessory dwelling unit) project will vary depending on the specific needs of the client, the goals of project, and the local regulations that apply. However, there are several common design phases that are typically involved in an ADU project. These phases may include:

  1. Initial consultation and PreDesign:
    This is the first phase of the design process, during which the property owner meets with an architect or designer to discuss their needs and goals for the ADU. The architect or designer will assess the property and gather information about the project, including the size and location of the ADU, general design style ideas, the intended use of the unit, and any local regulations or requirements that apply.

  2. Schematic Design:
    Here the designer works closely with the client to set the look and feel of the project and develop the conceptual floor plan, massing, and location on the site.

  3. Design Development:
    In this phase, the architect or designer will begin developing the design for the ADU in a more detail. This may include sketching over the preliminary plans, refining the function of the plan, setting the overall dimensions, selecting materials, and making any necessary revisions to the design based on feedback from the property owner.

  4. Construction Documents:
    Once the design for the ADU is finalized, the architect or designer will create detailed construction documents that specify the materials and construction methods to be used in the project. These documents will be used by the contractor to build the ADU.

  5. Bidding and Construction:
    In this phase, the property owner, often with assistance or guidance from the design team, will solicit bids from contractors and select one to build the ADU. It is important to carefully compare bids to make sure they include the same assumptions rather than just selecting the lowest number. Once the permit is issued, the contractor will then begin the construction process, following the plans and specifications provided by the designers in the construction documents.

  6. Construction Administration:
    During the construction phase, the architect or designer may be responsible for observing the construction process to confirm that the ADU is being built according to the plans and specifications. This may include reviewing progress, answering questions, supplying additional information or clarifications, and making any necessary changes to the plans.

Overall, the design phases for an ADU project will vary depending on the specific needs and goals of the project. By working with an experienced architect or designer, property owners can ensure that their ADU project is successful and meets all local regulations and requirements.

The design process is a vital part of the success of your project. Hiring an experienced designer can help guide you through the various steps needed to deliver a quality design that is on schedule and on budget. In order to save additional time and money, considering a pre-designed ADU plan could be a great way of shortening the design process by knowing that the design you chose has already been built successfully.

If you think a pre-designed ADU Plan is the right approach for you, check out our available designs ready to download today.

How To Make Your Short Term Rental Business A Success With An ADU

If you own a short-term rental property, or are thinking of starting one, whether it's an urban house, a backyard ADU, a casita, or a remote cabin in the woods, there are a few key things you need to know in order to run it successfully and profitably. Especially if you want to build an ADU as an investment and earn passive income.

  1. Short Term Rental Rules and Regulations

    Understand the laws and regulations that apply to your property. Different areas have different rules regarding short-term rentals, including zoning laws, occupancy limits, and tax or licensure requirements. It's important to understand these laws and regulations in order to avoid any legal issues or fines. You should also be aware of any specific requirements or restrictions that may apply to your property, such as noise or parking restrictions. It is important to be familiar with these and work with your local jurisdiction to file any necessary paperwork and obtain the right business licenses so you don’t get shut down. Running a short term rental is running a business and most cities or states will consider your rental a business and expect you to follow their business rules.

  2. Booking and Reservation Management and Fees

    Set up a system for booking and managing reservations. This may include setting up a custom website or listing your property on a popular platform like Airbnb or VRBO - although understand the fees they charge in order for you to be listed on their sites. You should also develop policies for booking and cancellation, as well as any additional fees or charges that you may want to add to the nightly rental fee. We have had past success on Airbnb, renting out an ADU we owned, and are currently building a small cabin we will rent out to friends and family through a custom booking site. We required a 2-night minimum in order to make it worth renting it out, we added a cleaning fee on top of the nightly rental amount (it is a single cleaning fee for the duration of the stay), and we also paid a percentage of the total fee to Airbnb.

  3. Cleaning and Maintenance of the Short Term ADU Rental

    Develop a system for cleaning and maintaining the property. Keeping your property clean and well-maintained is essential for attracting guests and maintaining a good reputation. It is also a considerable amount of work, thus it is very important to plan ahead. Develop a system for cleaning and maintaining the property, including a schedule for regular deep cleaning, repairs, and maintenance. You may want to consider hiring a professional cleaning company or designating a staff member to handle some of these tasks. We set up a system with a professional cleaner and they would automatically get scheduled to clean after any reservation was made. It was a great way to reduce the amount of work we had to do to manage the rental and ensure the next guest had a great experience.

    Part of running a short term rental businesses is planning for and budgeting these costs. You may think that you are charging enough to turn a profit but then get hit by unexpected repair costs that eat through what you earned. Make sure you are setting your rental rates after planning for ongoing cleaning, maintenance, and repairs so you don’t get caught by surprise. It is also recommended that you set aside some of the profits each month into a separate account that you then use to pay for minor repairs or significant maintenance or upgrades. And track all of these expenses so you can deduct them when filing your annual taxes.

  4. Guest Rental Policies and Procedures

    In order to ensure that your property is well-respected by guests, it's important to have clear policies and procedures in place and written in both the reservation platform and on site. These may include rules regarding noise, parties, smoking, and pets, as well as any other specific requirements or restrictions that you want to impose on how they use your space. Communicate these policies to your guests before their stay and make sure that they understand and agree to follow them. We also recommend having them printed and available on site as part of a guestbook or binder that they can access when needed. As each house, ADU, or cabin is unique, having a short “How To” guide with the basis for the house is a great way to make your guests feel at home. Give simple instructions on how to operate the heat and air conditioning, directions on where to find basics like extra toilet paper or towels, and a simple guide to activities on the property or in the surrounding area. If there are areas of the ADU or property you don’t want to them to use or there are specific places they should park, add these to the guide.

  5. Provide Amenities and Supplies for Guests.

    To make your property as attractive and comfortable as possible, it's important to provide amenities and supplies for your guests. This may include linens, towels, and basic toiletries, as well as appliances and other amenities like a coffee maker, microwave, or television. You should also consider providing basic supplies like paper towels, trash bags, and cleaning supplies. The idea is to make the place as easy to use as possible while hopefully reducing cleaning and maintenance costs.

    We often would leave a bottle of wine along with a gift card to a local cafe for our guests if they booked more than a couple of nights. Small details like that can go a long way in differentiating your rental from others on the market and lead to better reviews. Remember, you guests are going to be some of your best marketers. Look for things you can do to make them smile, encourage them to write good reviews, or even design details that beg to be photographed and shared on social media.

  6. Manage your Short Term Rental Finances and Pricing.

    To run a successful short-term rental property, you'll need to manage your finances and pricing carefully. This may include setting competitive rates, keeping an eye on competing rentals in your market, tracking your expenses and income, and keeping your property well-maintained to ensure that it stays in good condition and attracts guests. You should also be aware of any fees and tax implications of operating a short-term rental property and make sure that you are complying with all relevant laws and regulations. Although the potential income often sounds good, it is important to carefully estimate and plan for the costs you will incur running the business.

    Your Short Term Rental is not going to be purely passive income. It is a business and will take effort in order to be profitable. Make sure you develop a budget, track all expenses, and plan for bigger costs like repairs that only need to be done once in a while. As you develop a better sense of the costs of running the business, set your pricing and minimum nights stay to ensure that it is a profitable business.

  7. How Much Income Can Renting an ADU On A Short Term Basis Generate?

    You can definitely make a decent living renting out an ADU on a short term basis. As you plan to embark on this endeavor think about how many vacant nights you will have, how many hours or days you need between stays to turn the place over, what seasons will have more demand, what pricing you should set at various times to attract enough reservations, and what your operating costs will be.

    For example, if you are only renting out the ADU on weekends - like we did - you only have about 100 nights a year you can rent out the place. And perhaps summer plus holiday weekends will have high demand but winter weekends may not be fully booked. Planning on renting 70 out of the 100 nights may be a good estimate to build a budget off of.

    If you are renting out the ADU for an average of $200/night you could generate $14,000 in revenue (You may charge higher rates, like $300/night in the busy season but lower rates in the off season). However, you would have to subtract cleaning services, supplies, and maintenance costs, plus any other expenses needed to run the rental.

    Alternatively, if you were renting it out full time and had a 70% occupancy rate that would give you 255 nights rented each year. At the same average nightly rate of $200 you could make around $51,000 in revenue. Of course this is just revenue and not profit, but still that could be a pretty decent income for a business that doesn’t take up your full time to manage.

  8. Get Insurance for Your Short Term Rental and ADU

    Contact your current insurance provider to understand what coverage they provide for rental units on your property. Many home insurance policies won’t cover rentals so you probably will have to purchase supplemental insurance. Make sure that the policy you purchase will cover damages or accidents causes by guests and renters.

Overall, running a short-term rental property requires a combination of careful planning, business savvy , marketing strategy, and attention to detail. By understanding the laws and regulations that apply to your property, setting up a system for booking and managing reservations, developing a system for cleaning and maintaining the property, creating policies and procedures for guests, providing amenities and supplies, and managing your finances and pricing, you can successfully operate a short-term rental property and provide a comfortable and enjoyable experience for your guests and a steady income stream for you.

A short term rental business can take a lot of different shapes. If you already own a home and there is potential to add another unit, like a basement apartment, a converted garage, or a backyard guest house or ADU, that can be a great way to get your foot in the door and start earning rental income. One of reasons we think this is the best first step is that you already own the land so the startup costs can be much less than buying a new property. Not only that, adding an accessory dwelling unit can start generating monthly income now, but also increases your property value in the long run.

If you have any additional questions about adding an ADU as a rental unit on your property, or are thinking of building a small vacation home to rent out, feel free to reach out with any question or peruse our ready-made ADU plans that are downloadable today.

Building an ADU - What to know before you break ground

If you are considering building an ADU (accessory dwelling unit), there are several important things to consider before you break ground.

  1. Research local regulations and requirements. ADU regulations and requirements can vary depending on the location of the property, so it is important to research and understand the specific regulations and requirements that apply to your property. This may include obtaining the necessary permits, meeting certain zoning and building code requirements, and following any other applicable regulations.

  2. Determine the design of the ADU. The size and design of the ADU will depend on factors such as the size of the property, the intended use of the unit, and any local regulations or requirements. It may be helpful to work with a qualified professional, such as an architect or designer, to develop a plan that meets your needs and complies with local regulations. Alternatively, starting with a pre-designed ADU Plan can be an option to save time and money.

  3. Consider the cost of construction and financing options. Building an ADU can be a significant investment, so it is important to consider the costs involved and determine how you will finance the construction. This may include securing a loan, using savings, or seeking financial assistance from a government program.

  4. Choose a contractor. Once you have an ADU plan in place, you will need to choose a contractor to handle the construction of the ADU. It is important to research and compare contractors to ensure that you choose one that is qualified, experienced, and reputable.

  5. Consider the ongoing maintenance and operating costs of the ADU. Once the ADU is built, you will need to consider the ongoing maintenance and operating costs of the unit. This may include costs such as utilities, property taxes, insurance, and repairs. It is wise to plan for this in advance and work with your designer or builder to select low-maintenance long-lasting materials and systems.

  6. Set the timeline. Build and ADU takes a long time - months or even years depending on the size, complexity and location. Work with your general contractor to set a construction schedule and plan for any complexities and risks. Also plan some contingency as nothing works out exactly to plan.

  7. Involve your designer throughout construction. Drawings are a guide for builders to follow but can never have every detail and situation covered. Having your designer involved in the construction process can help avoid errors, answer questions, work through challenges, and ultimately save money. It is always cheaper to make revisions on paper before things are built. When contractor’s have questions it is best to consult with your design team to help solve the problem. The design fees during construction will be much less than fixing things that were built incorrectly.

  8. Hire a professional. Experienced designers and builders are more than worth their fees. They know how to get things done to a high quality and can guide you through the hundreds of decisions along the way. They also have relationships with other consultants that will be needed throughout the process. Although some people may be successful DIYing an ADU project, considering the amount of work it will take and time it will absorb, it is a great investment to hire professionals who can avoid mistakes, and keep the project on budget and on schedule.

Overall, building an ADU can be a rewarding investment, but it is important to carefully consider all of the factors involved before breaking ground. By researching local regulations, determining the size and design of the ADU, considering the costs involved, and planning for ongoing maintenance and operating costs, and hiring an expert team, you can ensure that your ADU project is successful.

White House Event on Making it Easier to Build Accessory Dwelling Units (ADUs)

It is clear that ADUs are growing into the mainstream of housing conversations when the White House starts discussing ways to make it easier to build accessory dwelling units across the country.

There were some excellent speakers, including Robert Liberty who I did some work with while living in Portland. My only criticism is it would have been nice for them to include some designers who specialize in these units to talk about design considerations as well as some of the hurdles we experience turning ideas into built homes.

On February 1st, 2022, the White House hosted a virtual event on making it easier to build accessory dwelling units (ADUs). Featured speakers included:

• Ambassador Susan Rice, White House Domestic Policy Advisor

• Sandra Thompson, Acting Director, Federal Housing Finance Agency

• Lopa Kolluri, Principal Deputy Assistant Secretary, Office of Housing and the Federal Housing Administration, Department of Housing and Urban Development

• Mike Hernandez, Vice President Engagement & Impact, Fannie Mae

• Mayor Miro Weinberger, Burlington, Vermont

• Denise Pinkston, President, The Casita Coalition

• Karen Chapple, Professor Emerita of City & Regional Planning, University of California at Berkeley and Director of the School of Cities, University of Toronto

• Kevin Skinner, EVP, Head of Home Lending, Umpqua Bank

• Noni Ramos, CEO, Housing Trust Silicon Valley

• Robert Liberty, Strategic Partner, Cascadia Partners

• Rodney Harrell, Vice President, Family, Home and Community, AARP Public Policy Institute

• Tom DeSimone, President & CEO, Genesis LA

Bainbridge Island Accessory Dwelling Unit Regulations and Code Requirements

If you own a property on Bainbridge Island, and are considering adding an ADU, here is what you need to know from a zoning perspective.

Can I build an ADU on Bainbridge Island?

The good news is ADUs are allowed as an accessory use on almost all residentially zoned properties. This means you don’t need any additional permissions or Zoning adjustments. As long as the design meets the regulations no special approvals will be necessary. This is great as many cities have been slow to adopt ADU codes.

What types of ADUs are allowed?

Accessory Dwelling Units on Bainbridge Island can be either detached, stand-alone units, created within an existing home (a basement conversion for example), and can even be built over a garage. My personal recommendation is that detached ADUs are the best option for most properties, although we have designed all sorts of ADUs over our career. ADUs over garages are a great way to add a rental unit without taking up too much land and have been very popular.

How many ADUs can I build on my property on Bainbridge Island?

The Bainbridge Island ADU code does have a one ADU per property limit. This means that if you convert your basement into an accessory dwelling unit you won’t also be allowed to build a detached ADU. I think this is unfortunate as many other cities, including Seattle and Portland, allow multiple ADUs - for instance, a basement ADU and a detached ADU. Hopefully Bainbridge Island will reconsider this limitation as they work to increase housing options and affordability. I think allowing a basement ADU plus a detached ADU would be a great code change.

Do I need to provide parking for the ADU?

Providing parking is another requirement when adding an ADU to your Bainbridge property. At least one off-street parking space must be provided for the ADU tenants. They also must share the driveway with the main house - meaning you can’t have two separate driveway entrances.

What is the size limit for ADUs on Bainbridge Island"?

There are a few other requirements, although they are mostly targeted at detached ADUs. The size of ADUs are limited to 900sf or less, and they must meet all of the zoning requirements of the overall property (such as setbacks, lot coverage, etc.) Of note, if ADUs are built in the same structure as a garage the garage doesn’t count against the 900sf limit. Stairs within the ADU also don’t count against the size limitation. Also, if you are making an ADU in your basement the City will allow the ADU to be larger than 900sf if it is filling the existing basement space.


Here is the exact language from the Bainbridge Island Municipal Code, Title 18 Zoning, Chapter 18.09 Use Regulations:

Accessory Dwelling Unit.

a. An accessory dwelling unit (ADU) may be created within, or detached from, any single-family dwelling, whether existing or new, as a subordinate use, where permitted (“P”) by this chapter.

b. In the shoreline jurisdiction, an accessory dwelling unit may be created within, or detached from, any single-family dwelling, whether existing or new, as a subordinate use, where conditional (“C”) pursuant to this chapter. See Chapter 16.12 BIMC for shoreline conditional use process.

c. Only one accessory dwelling unit may be created per parcel.

d. No variances shall be granted for an accessory dwelling unit.

e. One off-street parking space shall be provided in addition to off-street parking that is required for the primary dwelling.

f. Accessory dwelling units shall be designed to maintain the appearance of the primary dwelling as a single-family dwelling, containing 900 square feet of floor area or less. However, if the accessory dwelling unit will be located within a building existing as of the approval date of Ordinance No. 2015-16 (for example, in a basement) the city may allow an increased size in order to efficiently use all floor area. If a separate outside entrance is necessary for an accessory dwelling unit located within the primary dwelling, that entrance must be located either on the rear or side of the building.

g. If an accessory dwelling unit is constructed in conjunction with a garage, the square footage of the garage shall not count towards the 900-square-foot limitation.

h. An accessory dwelling unit not attached to the single-family dwelling may not contain any accessory use other than a garage.

i. No recreational vehicle shall be an accessory dwelling unit.

j. When stairs utilized for the ADU are enclosed within the exterior vertical walls of the building, they shall not count towards the floor area of the ADU.

k. The ADU shall share a single driveway with the primary dwelling.

l. School impact fees and qualified exemptions from those fees as provided in Chapter 15.28 BIMC shall apply.

m. All other applicable standards including, but not limited to, lot coverage, setbacks, parking requirements, and health district or city requirements for water, sewer, and/or septic must be met.

n. In the Mixed Use Town Center, new accessory dwelling units are only permitted as part of a housing design demonstration project single-family subdivision approved pursuant to BIMC 2.16.020.S.

How to Increase Storage in Small Homes and ADUs

Building an ADU, or backyard cottage on your property can be an ideal source of additional income. But maximizing that income and ensuring it stays steady means designing and building a space that tenants want to live in. Investing up front in small details, including providing ample storage, can create a more appealing living situation and may even allow you to raise your rental rates.

Consider these ideas for increasing small-space storage in your ADU:

Don’t Neglect the Closets

The more a tenant can put items “away” the more their space can feel clean, uncluttered, and spacious. Closets shouldn’t be an afterthought for ADUs and shouldn’t be considered a place to skimp or save space. Ensure there is a closet in every bedroom and ideally an additional linen closet, pantry, or coat closet. If there simply isn’t room, add a beautiful armoire in the bedroom to provide hanging space. Using nice furniture items can be a great way to supplement the built-in storage and contribute to the interior design of the accessory dwelling unit.

Use Vertical Spaces

Walls are the perfect spot to add extra storage, but tenants might be nervous about adding these items themselves for fear of damaging the walls. In the kitchen, consider built-in spice or knife racks, pot hangers, or simple floating shelves. In the living room or bedroom, floating bookshelves add space and are less bulky than furniture. Our Home Office ADU plan is only about 500 square feet, but offers discreet storage with built-in shelving and cabinets above the bed and modern floating shelves in the kitchen. We also included a small linen closet and access to the attic space over the bed nook for addition storage space. Coupled with ground floor vestibule with additional closet, this small ADU accommodates all the things most renters will want to store away. 

Install Shelves Above the Toilet

An additional vertical space to remember is the wall above the toilet, which is commonly wasted but provides a perfect place to install shelves in a bathroom without room for a linen closet. 

Maximize Under-Stair Areas

For two-story units, or units above a garage, make use of the under-stairs space on the exterior—and ensure it’s accessible for the tenant—for storing bikes, garden tools, and other outside items. Be thoughtful about wiring, water heaters, and other utilities in the space so the area isn’t wasted. If there are interior stairs, the space underneath is great for utilities like water heaters or even built-in washer and dryers. We have even seen nice home bars designed for the space under stairs. At the very least, make this space available as a small closet or cabinet. 

Create a Mini-Mudroom

More and more Americans prefer to take their shoes off before entering the home. Creating a built-in bench or shoe storage area with small shelves and hooks above can be more efficient than leaving shoes haphazard in the entryway. This is especially necessary if there isn’t room for a coat closet. If going with a bench in the entry, find one that can open and provide storage space. There are some bench products that include storage or you can have your designer create a custom built-in storage bench. 

Add an Outdoor Shed

One of the reasons renters choose an ADU over a traditional apartment building is to hopefully have some outdoor space. This is also an opportunity for a small bit of outdoor storage. A simple outdoor shed can provide space for emergency supplies such as extra water, outdoor tools, car supplies, and other extras, which are often hard for apartment dwellers to store, making them feel less prepared than homeowners. Best part? Adding a small shed takes no space away from your interior footprint. For tenants who love outdoor activities like biking, camping, kayaking, etc. an outdoor shed would be an amenity that can set your ADU rental apart from the competition and lead to higher rents or longer-term tenants. If your ADU is in places like Oregon, Washington, California, Colorado or other places with a big outdoor adventure culture, providing an outdoor shed for your tenants is highly recommended!

Make Use of Every Opportunity

If you’ve ever rented an RV or toured a boat, you likely noticed that every available space is maximized. You need to think similarly with your ADU. Take a step back and truly look at the space—what areas are wasted that could be put to use? These might include space above the kitchen cabinets, an oddly-shaped foyer, or an out-of-the way corner. For example, in our Backyard Oasis ADU floor plan, narrow cabinets installed next to the refrigerator are the perfect spot for storing brooms, baking sheets, and other awkward items. 

Ready to talk about building your ADU? Browse our ADU plans here or contact us for a consultation.

Why ADUs are Great For California

ADUs (accessory dwelling units) are becoming an increasingly popular housing option in California, and for good reason. There are many benefits to ADUs in California, both for property owners and for the state as a whole. Here are just a few:

  1. California ADUs can provide affordable housing options.

    California has a well-documented housing crisis, with high housing costs and a shortage of available units. ADUs can provide a more affordable housing option for individuals and families who are struggling to find affordable housing. Because they are typically smaller than traditional homes, ADUs can be less expensive to build and maintain, making them a more accessible option for many people.

  2. ADUs can increase the supply of California housing.

    By adding additional living space to existing properties, ADUs can help increase the overall supply of housing in California. This can help alleviate the pressure on the housing market and make it easier for people to find a place to live.

  3. ADUs can provide additional rental income for California property owners.

    By adding an ADU to their property, property owners can rent out the space to generate additional income.

  4. ADUs can provide additional living space for family members or guests.

    This can be especially useful for aging parents or adult children who may need a place to live but can’t afford market rate rents. By providing a separate living space, ADUs can offer a level of independence and privacy for these individuals while still allowing them to be close to the rest of the family.

  5. ADUs can be a sustainable housing option.

    By making use of existing resources and infrastructure, ADUs can be a more sustainable housing option than building new, standalone homes. In addition, ADUs can be built to be energy-efficient, which can help reduce the environmental impact of housing and save money on utility bills.

Overall, ADUs can provide a range of benefits to California, including increasing the supply of affordable housing, providing additional rental income for property owners, and offering additional living space for family members and guests. In addition, ADUs can be a more sustainable housing option, which can help California meet its goal of reducing greenhouse gas emissions and promoting sustainable development.

ADUs as Affordable Housing

For many people, the dream of owning a home is becoming harder and harder to achieve. But there is one solution that could provide more affordable housing options: ADUs. ADUs, or accessory dwelling units, are small apartments or homes that can be attached to or built beside a primary residence. And they could be part of the solution to our affordable housing crisis. They go by many names including: backyard cottage, carriage house, guest house, or even mother in law suite or granny flat. Regardless of what they are called these provide an opportunity to create new homes in our communities and provide affordable places for people to live.

There are many benefits of ADUs. They provide more affordable housing for homeowners, help seniors stay in their homes longer, and create more opportunities for shared living arrangements. They can also be an important source of income for property owners, often allowing people to afford to purchase their first home. We have found that there are three primary reasons people have come to us to start their ADU projects: building a rental unit to generate income and increase their property value, create a place for an aging family member to live, or to downsize their home while staying in the neighborhood they love while renting out the main house.

Policy

Beyond homeowners, many towns, cities, and states are looking at ADUs as one piece of the puzzle to address some of the housing issues facing our communities. Governments are enacting new policies to allow ADUs by right, make ADUs easier to permit, and open up new opportunities for ADUs to be added to a wider range of properties. These policies take many shapes from zoning code updates to incentives for homeowners to build ADUs. Some places, like Oregon, Washington, California and other states have passed laws to allow ADUs on any residential properties state wide. In California, they have taken a further step to try to make ADUs more affordable to build by providing grants for homeowners to help cover some of the costs of designing and permitting these projects.

Beyond the states that have already adopted ADU specific codes and regulations, many states are actively working on implimenting new policies to allow accessory dwelling units. New York State has a bill going through their legislature that would legalize ADUs statewide - mandating that each town/city/county add code language that allows ADUs. While many cities across the country are also adding ADU language to their zoning code.

It is clear that these projects are growing in popularity and our government representatives are hearing from homeowners in their jurisdictions who want more flexibility to add ADUs to their properties.

Affordable Housing

Although ADUs can be naturally affordable regardless of who builds it since there is no cost for the land, they are also becoming a tool governments and non profits are using to create subsidized affordable housing. For example, Portland, Oregon is allowing more than one ADU per property if one of the units is designated as a permanently affordable rental unit. This incentive is encouraging developers and homeowners to build subsidized affordable units.

Many affordable housing non-profits are also looking at ADUs as a way to increase their housing portfolio. Often community development corporations own single family homes and rent them out below market rate. ADUs allow them to add additional units to these residential properties, creating new affordable units.

There has also been experiments where cities or counties have financed the construction of ADUs on private properties, using these units as affordable or transitional housing for a set period of time, after which the land owner will own the ADU. Basically, a homeowner donates the land for a fixed time period - often around 10 years - and the city builds the ADU and offers it to someone in need. After the time period is up, the landowner takes ownership of the ADU and can rent it out themselves. This is an intriguing way to incentivize the creation of ADUs as affordable housing while making it accessible to those that may own a property but don’t have the capital or access to financing to build an ADU on their own.

Naturally Affordable

One of the best aspects of ADUs when it comes to creating affordable homes is that the land isn’t a development cost. Since homeowners already own the land, adding an accessory dwelling unit only costs the fees associated with design, permitting, and construction. This makes them naturally affordable compared to most other types of housing.

Rental Income Can Make Housing More Affordable

The other big benefit of ADUs is they can make purchasing a home more affordable for more people. If you are a young professional looking to purchase a home, finding a property with an ADU that you could rent out, could allow you to afford a property you may otherwise not have been able to. Or if you can look at properties that could easily add an ADU - like renovating the basement into a JADU or it has a backyard that could accommodate a detached unit - you may be able to stretch your budget knowing you could create another unit that would generate rental income to help offset the mortgage expenses.

Financing

Building an accessory dwelling unit is not cheap. They are significant investments and can easily cost hundreds of thousands of dollars. Financing for these projects typically takes the form of home equity line of credits or cash-out refinancing for those who don’t have the cash on hand to cover the cost of design, permitting, and construction. However, this isn’t available to every homeowner out there. Most lower or middle class families don’t have the cash available or the equity in their properties to cover the cost of an ADU.

This challenge is another place that governments and non-profits are working to address to make more ADUs and thus add affordable homes. Places like California are introducing a grant program to cover up-front soft costs for ADUs. Other places are working on creating public-private partnerships to allow more diverse loan options to help finance these projects. And like we mentioned above, some governments are even covering the cost of building the ADU in exchange for using the ADU as affordable housing for a set period of time.

It is important that more attention is paid to how much these projects cost and ways to make the money necessary to build ADUs more accessible to a wider range of homeowners. I personally would love to see it possible to finance ADUs through a typical construction loan or mortgage product.


Design Process: Additional Services

We have outlined the general phases of the design process in earlier posts. However, there often are other services that we offer to make your project easier to achieve. None of these are required to get an ADU designed, permitted, and built, but some can make your project a greater success or take some work off your plate so you can focus on other things. Additional services for ADUs or Custom Homes allow us to customize the service offerings to the unique needs of each client and each project.

Property Search and analysis (Feasibility Study)

You are looking into buying a new home and want to know what the potential is to add an ADU as a rental unit. Or perhaps you want to analyze your current property to better understand the opportunities and challenges for adding an accessory dwelling unit or other property improvement project - like a major addition, remodel, or even a new custom home design. It is also a great idea to do a feasibility study when considering purchasing of a piece of land. If you are considering any of these options a feasibility study is highly recommended as the first step. Whether you hire us or engage another design team, it is worth investing in this preliminary research before you commit to a larger project or before you close on a property purchase. Zoning research, site analysis, property review, and other research is can save significant money or prevent you from beginning a project before knowing exactly what is allowed. Whether you are considering an ADU, a major remodel, or a custom home design, this is a valuable service that is worth the upfront investment.

Interior Design

Some clients love shopping for materials, finishes, appliances, and picking out colors and other interior elements for their homes and ADUs. Others don’t have the time and want someone to assist with this process. Since most interior finish selections don’t affect the permitting process this service isn’t necessary to get a custom home or ADU approved to build, but it can make a big difference for the look and feel of your project. An interior design that matches the aesthetics of the exterior and creates a welcoming environment can make or break your project. And interior design is especially important if you are planning to rent out the ADU as a long or short term rental. You want durable materials and finishes as well as a noteworthy, photogenic design that will set your rental apart from the competition. This service can include selecting all of the finishes like tile, counters, cabinets, fixtures, and hardware or can include additional tasks like helping select furniture, artwork, and other decorations to bring the space together and feel warm and inviting. Custom home and ADU Interior Design can take a great deal of time and effort but can have a great return on investment. This is why we recommend that our clients hire a professional designer to assist with this work. Typically we like to work with you to at least select all of the materials, finishes, and fixtures that will be attached to the structure which is why we offer interior design as an additional service for our ADU and custom residential clients.

Existing Conditions Drawings (As-Builts)

Most of the projects we work on are detached new construction ADUs or custom residences. However, when an ADU interacts with an existing structure on your property it is necessary to document the existing conditions. Often these are called as-built drawings, and include creating dimensioned drawings of all the existing spaces and structures that will be affected by the project. Most designers will offer this service or sub-contract it out to another drafting company. It is worth the investment to get an accurate drawing set that shows the current conditions of your home before you start any project.

Renderings

Three dimensional views of the project are another part of the design process that isn’t necessary for the permit approval process but can be a great tool to make design decisions. Taking these views a step further, you can use modeling and drawing software to create rendered views that show materials, finishes, lighting, furniture, people and other effects to really show what the spaces will look and feel like. We often do a couple exterior and a couple interior renderings so our clients can see an approximation of what their project will look like after it is finished. This allows them to have the confidence they will like the final design prior to starting construction. Good renderings do take time and thus cost money, but we always find it is worth spending a bit of extra effort during the design phase to prevent changes or worse, regrets, once construction begins. A couple thousand dollars during design can save tens of thousands during construction. If you are unsure about what your project will look like or how the interior spaces will feel by looking only at plans, sections, and elevations, ask your design team to make some renderings. It is an added service but can give you a better sense of the final project plus are great to share with friends and family so they can see what you are planning!

Physical Models

These are pretty rare these days as most firms have moved to digital drafting and 3D visualization software. However, some clients think better when seeing a physical model of their new home or ADU. We have built a few models for clients and they can be a valuable tool to help make design decisions. They can be time consuming if you are looking for a lot of detail. Simple massing models, or chipboard diagrammatic models can be quick and cheap, but detailed wood models can be very time consuming and could add significant cost to the design process. Still, like with the renderings, it is still cheaper to invest in the design process than try to make changes once construction begins. It is better to be sure about the design direction and sometimes physical models are the best way to think through a design challenge or capitalize on an opportunity.

Meetings and Presentations: Design Review, Community Engagement, Neighborhood Associations, Historic Review, and other meetings or presentations.

Certification Process & Applications: LEED, Earth Advantage, Passive House, Net Zero, or other certifications.


ADU Cost: What Can We Learn From Portland?

We look at ADU Costs in Portland and around the country with designer Lucas Gray, who has been designing custom ADUs for several years. Portland is a very mature market, so it's nice to look up there to see what we can learn about the costs of building an Accessory Dwelling Unit (ADU). Lucas Gray, from Modern ADU Plans, came on the show to talk shop and goes into the costs of ADUs, what homeowners can do to budget and control their ADU cost, and more.

If you are thinking of adding an ADU but are curious what sort of investment you will need to make, watch this interview to learn more about how much Accessory Dwelling Units cost and other tips on the design and construction process. It is important to compare the investment you make in creating an ADU with the return you will get through rental income, property value increases, and other benefits. ADUs aren’t cheap, but they are a great investment when you weight the costs and returns.

It is also important to consider that costs can cary greatly from place to place. California ADUs may cost a lot more than Portland ADUs or Texas ADUs, but with higher rental prices these projects often make sense in any location that they are allowed.

ADU Requirements Around the Greater Portland Metro Region

Although we started working on ADUs by doing custom designs for our clients, we are now selling ADU plans much further afield from our Portland roots. Unfortunately, there aren’t any standard ADU regulations that permeate across the country. Instead, each town, city, county, and state has their own rules and regulations. Starting in the greater Portland Metro region we will start adding links and resources for various requirements for ADU projects.

Although there are many similarities with requirements for Accessory Dwelling Units in areas outside of Portland, Oregon (or even the states of Washington and California) there are aspects of the general requirements that we also see vary by town or county jurisdiction.  What we've noticed that can change across jurisdictions are:

  • the size of ADU's (ex. maximum sizes can range from 400-1200sf and codes are often changed over time)

  • height limitations (we’ve seen rules that dictate ADU heights from 10’ to 20’ and in some places there may not be a height limit at all)

  • the types of ADU's allowed (ex. Detached, Attached, Basement, Garage, junior, or others)

  • the number of bedrooms (ex. a limit of 1, 2, 3, or no limit)

  • are ADUs even allowed (unfortunately many jurisdictions still don’t allow them and within jurisdictions, some neighborhoods or HOAs limit ADUs further.)

  • Style (some places have rules on what an ADU can look like.)

The common theme is that town planning departments and communities generally accept Accessory Dwelling Units, although they aim to "maintain the character" of the neighborhood, and this sets the setback(s) and/or limits the height so that the primary residence remains the dominant element present to the street.

In order to help clarify all of these differences, we have listed some resources below for the towns and cities around the Portland region. While we're only covering a few of the towns outside Portland to the south and west, we hope to add more to this list over time, so if you would like us to look into and add your town to this list, please get in touch!

Accessory Dwelling Unit or ADU Requirements, by town:

Clackamas County ADU Requirements

Clackamas Maps

Clackamas County Zoning Map (PDF)

Clackamas County Zoning Code Table 315-1: What Zones are ADUs allowed in

Gladstone R-5 ADU Requirements

Gladstone R-7.2 ADU Requirements

Milwaukie ADU - Attached

Milwaukie ADU - Detached

Oregon City ADU Requirements

Tigard ADU Requirements

Portland ADU Requirements

Portland ADU Zoning Code

Vancouver, WA ADU Requirements

ADU Design Considerations

Small in size doesn’t equate to easy design work. ADUs require a lot of thought and careful design considerations to arrive at the best solution for your needs. Here I will point out some important considerations that we address through our ADU design process. Specifically, I am highlighting some aspects of ADU design that may not be obvious when first thinking about adding an ADU to your property.

Size of the ADU

Although maximum size of ADUs is often restricted by local codes, there are lots of considerations that affect how large you want your project to be. Of course the project budget will affect the overall size of the ADU but other things like size of your backyard, use of the project, number of bedrooms you are looking for, even the topography of the site could affect the final size.

Beyond the total square footage of the project, there is also the decision of the size of the footprint of the new ADU. As an example, if you wanted an 800sf ADU, should it be all on one level for an 800sf footprint, or should it be a two-story project with a 400sf footprint and 400sf second floor? These decisions can affect the cost of the project and also have a profound impact on your property. Smaller lots might dictate a smaller building footprint and 2-story structure in order to preserve some outdoor space. While larger properties may lead to a single-level ADU with a larger footprint, but no stairs and less height.

Less is More

In this case I mean it literally. The less things you put into an ADU the more space you will have for living. One bathroom instead of two gives you extra space in the kitchen, a dining nook, or larger living room. Less space in the bedroom gives you more space where you spend most of your time.

ADUs are small homes and it is important to consider what spaces are the most important and where the users living in the ADU will spend most of their time. We find that larger kitchens and spacious living rooms are the best place to invest in extra space, while bedrooms and bathrooms should be designed to be efficient but compact.

Outdoor Connections

With limited space to work with within an ADU we look for strategies to make the smaller dwellings feel more spacious. We use borrowed views, strategically placed windows and doors, and outdoor rooms to make our ADUs feel more spacious. When living rooms open up to patios or covered decks we create bonus space for living that isn’t counted against the square footage limits. Plus, connecting to the outdoors physically and visually makes for a better interior with more natural light, fresh air, and views of nature.

Landscape Design and ADU Location

Beyond the outdoor connections, we also consider how the ADU responds to the surrounding landscape and overall design of the property. How will people access the ADU from the street? What is the circulation patterns on the property? Where should the front door be located? Where should the living room or bedrooms be located? Can they open up to the outdoors? How can we preserve private outdoors space for both the main house and the new ADU? How can privacy be preserved between the units?

It is important to consider how the landscape will be used and how the ADU design and location can compliment the rest of the property. Buildings are never isolated objects but rather are integrated parts of a larger landscape. It is important to consider all the impacts the ADU will have from the beginning of the design process.

Design Style for the ADU

We start the design process by having conversations with our clients about aesthetics, style, and materiality. We want to understand our client’s taste and design values so we can create an ADU design that closely aligns with their taste. We want to make sure our clients are happy with the outcome and to accomplish this goal we need to get to know our clients and what they like and don’t like from the early phases of the design process.

These conversations start with sharing precedent studies, asking our clients to do some homework by collecting images of spaces or projects that they like as well as those that they don’t like. We also discuss how the project will fit in with the surrounding context. Does the ADU need to match the style of the main house? What are the benefits of having the ADU be a different style? Are there specific regional materials that could or should be used on the project? What is the local building culture and how would that affect the design or details? What is the climate and prevalent weather patterns and does the design need to respond to those factors?

All of these questions help us develop a strong foundation from which to start our design work. These conversations also allow us to get to know our clients better and share our thoughts and opinions about our ADU design approach. Getting everyone on the same page early on helps avoid going down the wrong path or having to rework designs later on in the process. It also helps us make sure our clients are happy with the end result.

ADU Design Restrictions

Understanding the local rules and regulations that affect ADUs is imperative to a successful project. Many towns and cities have limitations on ADUs, both in terms of size, height and even style. Often there are rules about what materials can be used, or style guidelines related to existing houses on the property. We begin each project by doing research to understand these regulations and documenting any restrictions that could affect the design of the project. We discuss these with our clients to set expectations on what can be achieved. Starting the design process with these in mind helps us develop better designs that meet the requirements saving time and limiting future revisions.

Conclusion

These are just a few of the many design considerations we balance when working on ADU projects. Although ADUs are relatively small in size, they are complicated projects that need a carefully considered design approach. The most successful projects are ones that consider how they relate to the surroundings as well as how people will use the interior spaces. Considering all the various factors and having these important conversations between the design team and clients will only lead to a better project and a more beautiful solution.

It is also important to understand that working through the research, discovery, and design iterations, to end up at the best result takes time. Rushing through these decisions doesn’t lead to a better ADU. It is worth the effort and investment in these early design considerations so your ADU is the best it can possibly be.

Video: ADU Costs - What we can learn from Portland

I was interviewed by Ryan O’Connell from How To ADU about the cost of designing and building ADU projects in both Portland (and across Oregon State) and in the Bay Area (and across California). You can watch the interview below.

How To ADU has a ton of great resources, articles, and videos about ADUs. It is a great place to learn more about these projects. If you are considering an ADU but want to learn more check out their site (or of course you can contact me as well).

There are a few other ways you can get started with an ADU project. I offer custom design services for clients looking for beautiful and sustainable ADU projects. I love working with clients who want to create high quality spaces and don’t want to sacrifice on quality.

I also sell pre-designed ADU Plans for people who are looking to save time and money and who can’t afford fully customized design. There are over 15 different designs and plans available that can work for almost any need. Click the button below to shop for the plan that fits your specific needs.


What Is An ADU?

Definition of ADU (Accessory Dwelling Unit)

Although they are called by many names depending on where you live, an ADU, which stands for Accessory Dwelling Unit, is a second home that is located on the same property as a primary residence. More and more cities are now allowing ADUs to go with main houses thus providing more housing in our neighborhoods without creating more sprawl. Primarily ADUs are located on residential properties that are zoned for single family housing, although the can also include living spaces in basement apartments or additional units on some multi-family properties.

Accessory Dwelling Units can take many forms as we will discuss below, but they need a few basic elements to be considered a full dwelling. Each ADU must have a kitchen, bathroom, living space, and sleeping space to be considered an ADU. They are full stand-alone dwellings that can provide everything someone would need to live in the unit long term. Basically they are smaller houses, typically limited in size and height by local zoning regulations.

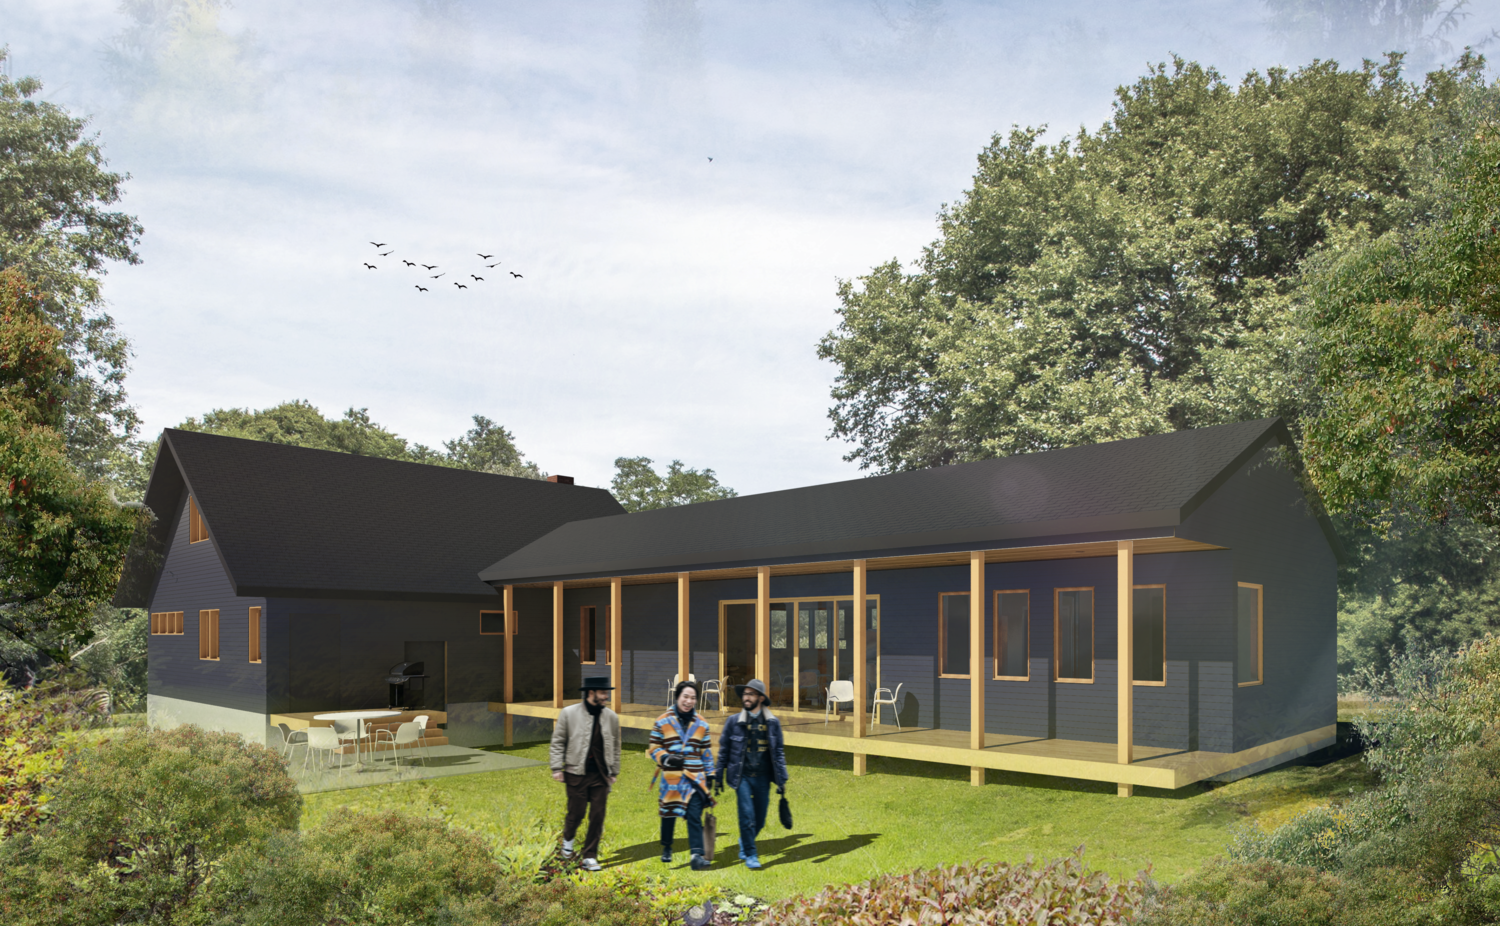
View of a backyard detached ADU we designed on Bainbridge Island, Washington. Detached ADUs are the best option for rental units or for aging-in-place.


Types of ADUs

There are a range of options for creating ADUs on a particular property. These include building a detached ADU as a stand-alone structure, our preferred option. You can also build an accessory dwelling unit as an addition to your existing house, sharing a wall. Renovating a basement into an ADU is common, as-is converting an existing garage into a living unit. I have seen a few attics converted into ADUs, although creating a separate entrance can be challenging. I have even worked on a couple of projects to carve out parts of a client’s main house into an ADU, dividing it into two dwelling units under one roof. I have also designed ADUs over garages which is a very common request, especially in urban locations where off-street parking is desirable.

Although there are many options, and there may be a specific type that best suits your property, by far the easiest type of ADU to build is a new construction fully detached ADU. There are a bunch of advantages to keeping the new unit separate from the main house. First, from the perspective of someone living in each unit, having a fully separate dwelling is a nicer experience from a noise and privacy standpoint. There are no shared walls or floors, sound insulation isn’t much of an issue, utilities can be completely separate, and with careful design consideration, each unit can have some private outdoor space to enjoy.

There are also some technical reasons I recommend detached ADUs. Working within the confines of an existing structure can be difficult - especially if you have an older home or aging garage. Building new living units requires that it meets current codes and regulations. When building within an older house, cities often use the new project as an opportunity to make people upgrade the existing home to meet current codes as well. This could mean doing structural upgrades, replacing stairs that don’t meet code, adding egress windows, putting in fire and sound separation, and sometimes even adding residential sprinkler systems to the house. These can be complicated upgrades that add significant cost to the project. Plus, doing a detached ADU give you the most flexibility with the design, to make a space that is both great to live but also meets your style and aesthetic choices.

Examples of ADUs

Discussing the types of ADUs that can be built is one thing. Seeing examples of what these spaces can look and feel like is something else. Below are a range of projects that showcase the various types of accessory dwelling units that are possible. All are designs that I worked on and styles that vary based on the location, the client’s needs, and surrounding context.

Other common names for ADUs

Although ADUs, or accessory dwelling units, are the technical term used to describe these project types, there are many other common names to describe these housing types and the common use of these names vary depending on location.

Backyard cottages, granny flats, laneway houses, casitas, and guest houses are all common terms used for the stand-alone detached ADUs. For garage conversions or apartments built over garages you may hear them called carriage houses or garage apartments. These have been featured in pop-culture, specifically the Fonz lived in an ADU over a garage in Happy Days, and one of the main characters in the Hulu show The Handmaid’s Tale also lived in an apartment over the garage. In the show Full House the family had both a basement ADU and an Attic ADU.

Attached ADUs have been called bump-out ADUs in some places although this isn’t the most common ADU type. On the other hand, basement ADUs are some of the most common ADU projects and have many common names including: basement apartments, au pair units, mother-in-law units, in law units, Pied-à-terre, secondary suites, accessory apartments, to name a handful.

Regardless of what they are called we believe adding an ADU is a great idea and a worthwhile investment. They provide housing, can increase your property value, and can also generate rental income. You could also consider building yourself an ADU to live in while renting out the primary residence to a young family. Or perhaps you want to having aging family members live close by to save on the cost of care or to have grandparents nearby to help with childcare. Regardless of the reason for building an ADU, we think they are great projects that are fun design challenges.

One thing of note, ADUs are not tiny houses. Tiny houses are their own category of dwelling and typically refer to very very small units built on wheels. Unlike tiny houses, Accessory Dwelling Units are built on real foundations and are permanently fixed to their location just like a full sized house.

Typical Uses For ADUs

There are many reasons people consider for adding an ADU. Sometimes it is for increased living area for their family. Often it is to provide housing for an aging family member so they can be close by if they need care. Perhaps the most common reason to build an ADU is as a real estate investment, to generate rental income and increase property values. Building an ADU can be a great investment regardless of the use. As a property owner, you get to leverage an asset you already own - land - to add a new home. This is a low-barrier to entry into small scale real estate development. Accessory Dwelling Units also can be designated as affordable housing. Many cities, like Portland, Oregon, are actually incentivizing people to make ADUs affordable by waiving some of the development fees and also allowing property owners to build additional units if a percentage are designated as affordable. Even without the incentives and designations, adding an ADU creates naturally affordable housing since there are less costs to build an ADU than a new house considering the land is already owned and the size is limited.

We also sell Modern ADU Plans in order to help make these more affordable to a wider range of people.


ADU Design Process

In order to deliver great services to our ADU clients we have developed a design process that we use to direct each project. This process has been refined over the past 10 years designing over 60 ADU projects across Washington, Oregon, and California. We want you to know what to expect when you choose to work with us and to know that by going through our design phases you can have confidence that we will arrive at a great design solution to your problem. Plus, designing can be fun. Once you know what to expect, you can relax and enjoy the process of design and participate in the creative energy of crafting a beautiful ADU.

The Five Phases of Every Project

Design is a process of discovery, where you share your goals and ideas, we learn about your needs and your lifestyle, and together we craft a layout and design that balances all the influences into an ideal solution. If you think of it like cooking, first we need to identify and gather all of the ingredients. We then need to cut, chop, blend, and measure them to make sure they are in the right mix. We then spice them and cook them together. Finally we plate the dish, and serve it. Five steps are needed to refine everything that goes into a project. We break them down into the following phases:

Pre-design - PD

The pre-design phase is when we conduct the research needed to lay the foundation for the future design work. This includes zoning and code research at the city offices, a thorough analysis of your property, coordinating a survey of your property, and meeting with you to create the program for the project.

A program is a spreadsheet of all the spaces desired for the ADU as well as any other features or items that need to be considered in the design. We want to identify all of the rooms, rough sizes, notes on any adjacencies that are preferred, ideas on how interior spaces connect with the outdoors, and any other goals for the project. For example, a recent c;ient we worked with was building an ADU for their aging mother to move into. Although ADUs are a small home it was important that we designed space in the living room to fit her baby grand piano. It is vital to get information or requests like this documented up front so we can meet your expectations. As we develop the floor plans and layout of your project we want to make sure the design work takes your ideas and specific needs into account.

Deliverables:
Measured Site Plan
Programming Document
Surveyor has been hired

Schematic Design - SD

With the research complete, understanding the specifics of your property, and the programming document in hand, we begin designing your project. We typically start with exploring floor plans, and developing a site plan to talk through how the ADU will sit on your property, and how the interior spaces will be organized. We typically present a few options and have a working meeting where we talk through the pros and cons of each option and sketch together to narrow in on a preferred choice.

After this first SD meeting, we refine the site plan and floor plans based on your feedback so it’s the right solution for you and your property. We have a second meeting to go over the refined floor plans and begin talking about the 3D views of the project and define the overall look and feel. This includes talking about elevations of each side of the ADU and sections through the spaces to show vertical relationships. In the meeting we will discuss the functionality, flow, style, and other aspects of the project that could affect the details and costs. This will be another working meeting where we will sketch together to refine our design ideas to best address your taste, needs, and budget.

Deliverables:
Schematic site plan, floor plans, building elevations, building section
3D views as needed to describe the design intent

Construction Documents - CD

With the overall form, layout, look and feel of your project now defined, we begin the process of documenting the design to get it ready for both permitting and construction. We will gather and/or create all the documents needed to acquire permits and get an accurate bid from a general contractor (GC). We’ll also coordinate the necessary engineers and other consultants and combine their work with ours. This is the phase where we finalize all of the details like finishes, fixtures, and equipment to match your preferences and budget.

During this phase, your designer will create a dimensioned site plan, demolition plans, floor plans, cross-sections, elevations, construction details, and finish schedules. They will also coordinate with any sub-consultants needed to complete the work like structural engineers or other experts. At the conclusion of the drawings your contractor will provide an updated construction bid based on the final construction documents.

Deliverables:
Dimensioned site plan, floor plans, reflected ceiling plan, building elevations, building sections, interior elevations, enlarged floor plans, assemblies and construction details.
Door, window, and finish schedules
Finishes, Fixtures, and Equipment

Permitting

At this point the design and documentation work is complete. Before we can break ground and start construction we need to get permission by the local building department. Unfortunately, each town, city, county, or state, has their own rules and regulations when it comes to permitting a new building, even small ones like ADUs. During this phase we will work with the local officials to fill out all of the paperwork and supply all of the drawings and other information needed for them to review the design and ultimately approve the project. Typically this includes a few rounds of questions and revisions requested by the reviewers as they compare the designs against all of the local laws. We will work with them to make sure they have everything they need and your project gets reviewed and approved in a timely manner.

It is important to note that each jurisdiction has their own rules and their own process. It is very difficult to predict exactly what they will request or what the timeline will be for the review process. We do our best to research the local requirements and plan accordingly but the actual review process is out of our control. There are also some additional reviews that could be required that can add time or fees. For instance, projects in historic districts require special review, which may mean more time and additional fees. We will identify this during our Pre-design research and inform you of any special circumstances that we will have to plan for.

Deliverables:
Approved building permit
Construction Drawing Set

Construction Administration - CA

During the construction phase we communicate with you and the contractor to answer questions or provide additional information to help realize the design intent. We check quality by periodically visiting the site to observe progress. We also are available as a resource to answer any questions the GC has or to clarify anything on the drawings. We can also help work through any challenges and review and approve any requested changes the GC proposes. Construction includes many steps and a lot of communication, and we are with you along the way in order to help facilitate a high quality finished project. We are you trusted advisors and advocates to make sure that the end result is in alignment with your values and expectations.

Deliverables:
Designer involvement throughout construction
Periodic site visits to observe construction progress

Project Closeout

Now that construction is complete there are a few final tasks to closeout your project. First, we want to celebrate the success of the project. We sponsor a small gathering at your ADU to acknowledge all of the hard work the entire project team has put into the effort. We invite the entire design team, clients, consultants, and contractors to gather and celebrate the achievement. We provide the refreshments if you are kind enough to offer the ADU space.

Finally, we schedule a professional photographer to come out and document the completed project. We want nice photos to use in our portfolio and marketing materials so we can show future clients the work we have done. We also want you to have copies of these to show your beautiful ADU to friends and family.


Additional Services

Although we find the process above can serve most ADU clients and deliver a great result, there are always situations that are unique or clients who have particular requests outside our standard scope of work. We offer a range of additional services that can be added depending on your needs and the specifics of your project.

  • Renderings

  • Physical model building

  • Additional design options

  • Landscape design

  • Historic Design Review

  • Sourcing materials

  • Furniture selection

  • Certifications (LEED, Passive House, Net Zero, Earth Advantage, etc.)

These are a few of the services that have been requested, although if there is some way we can add additional value to your project that isn’t included here, please reach out to us and lets talk through how we can help.


The interior of the Stilts ADU in Portland, Oregon, used reclaimed doug fir for the flooring, ceiling, trim, and counters, creating a unified, warm and inviting interior.

The interior of the Stilts ADU in Portland, Oregon, used reclaimed doug fir for the flooring, ceiling, trim, and counters, creating a unified, warm and inviting interior.

Definitions

Programming: programming involves research and decision making that helps the designer and owner establish the requirements and design criteria for the project. Programming can range broadly from identifying the project’s goals and objectives to particular elements, such as the precise size and characteristics of a space. It is an essential first step before the design phase and a critical communication tool throughout the project. A program guides participants from concept to construction documentation.

Survey: Site surveys are inspections of an area where work is proposed, to gather information for future design work. It typically determines the property lines, topography, location of existing structures and site features.

Section: A section drawing, or simply a section, shows a view of the design as if it was sliced vertically. Where a plan is a drawing looking down at the layout of a home, a section is a vertical drawing that shows the relationship of spaces vertically. We typically use these drawings to show ceiling heights, lofts, stairs, relationships between first and second levels, and other vertical design features.

Reflected Ceiling Plan: Where a plan shows what is happening on the floor, a reflected ceiling plan, or RCP for short, shows where the design elements on the ceiling would correspond to the floor plan. It is reflected because rather than looking up at the ceiling, the view is actually looking down at the floor but reflecting what is happening on the ceiling above.

Finishes: This is simple a fancy word for materials. Finishes are all the things we need to select during the design process like flooring, cabinet fronts, countertops, tile, siding, roofing, etc. We want to select and document all of the materials that will be attached to the building in order to get accurate cost estimates.

Fixtures: These are the all the accessories that are attached to the building - things like faucets, showerheads, lighting. fans, switches, outlets, smoke detectors, and others.

Assemblies: This is a drawing that show all of the layers and materials that make up a floor, wall, or roof. It is a detail drawing that is used to inform the contractor how to build, or assemble, those items.

Schedules: Typically we use schedules for all of the doors, windows, and rooms in a project to create a spreadsheet that adds additional information that can’t fit on the drawings themselves. For instance in a window schedule we will list every window in the project and describe the manufacturer, model, size, height, materials, color, operability, and other information. In a room finish schedule we list out all of the rooms in a project and then describe the materials that will go on each wall, floor, and ceiling.

How Much Does An ADU Cost?

More and more people are considering having an ADU designed and built for their property, and one of the primary questions they have is how much does an accessory dwelling unit cost to build? People like you want to know how to start budgeting for ADU projects whether they are living on Bainbridge Island outside of Seattle, in Portland, OR, or down in Los Angeles, California. ADU Cost is one of the most common questions we get and we will do our best to outline the areas that impact ADU budgets below.

The problem with googling “ADU Cost”

A quick search on google for cost of construction can lead to a wide range in estimates, and most of them are not realistic, especially for ADUs. Having worked on over 60 ADUs to date we have designed everything from simple 500sf projects on flat lots to larger 1000sf ADUs on tricky sloped sites. We have a good sense of the cost ranges for these projects and what factors impact the final price. We will do our best to outline how to set your budget and then will give a breakdown of ADU costs from a recent project that you can use as starting point to build your budget.

But first, let’s discuss cost per square foot numbers and why you shouldn’t use this is a way to develop a budget for ADU projects.

Many resources on the internet, some contractors, and many clients use cost per square foot as a basis to develop a budget for residential projects. I want to urge you not to use this as a metric to analyze your ADu budget. Although this can work if you have your numbers correct, we find that it can be very misleading for budgeting an accessory dwelling unit compared to a full custom home. The main problem has to do with scale.

Just like a large home, ADUs have all the expensive parts needed to live - a functional kitchen, bathrooms, plumbing and electrical systems, windows, doors, excavation and utility work, plus design costs and permitting fees. On a large home these costs get spread out over the larger square footage and cheaper space to build, like bedrooms and living rooms. A good way to think about it would be that the cheaper rooms like bedrooms and living rooms subsidize the more expensive rooms like kitchens and bathrooms plus utility connections, etc. ADU floor plans don’t have this advantage since they are limited in size.

Not all square footage is the same cost. A bedroom is just empty space with blank walls, a couple of windows perhaps, some flooring, and a couple of doors. This is relatively cheap to build. A kitchen on the other hand has all the walls and floor, but more lighting, appliances, counters, cabinets, plumbing work, more complicated electrical, etc. It is much more expensive to build. Where a bedroom may be $150/sf a Kitchen is more like $400 or $500/sf. This means that going from a 700sf to an 800sf project can actually bring your cost per square foot down considering both have a kitchen and a bathroom. The 800sf ADU spreads those costs out over an additional 100sf.

With ADUs being so small, they don’t have the extra square footage to spread the base costs out like a larger home does. A $200,000 five hundred square foot ADU would have a cost per square foot of $400. Where a $600,000 two thousand square foot home would only be $300/sf.

The point here is that we encourage people to develop a budget and then work to design something to hit that total project number. The size of the unit is less of an impact on final cost than the form, site conditions, materials, and systems selected. Start your project knowing that the base cost of building an ADU will be about $200,000 and then the decisions you make with your design team will impact what the final cost ends up being. Our advice is usually that ADUs come in between $200,000 on the low end and $500,000 on the upper end. We have seen some luxury ADUs in the Bay Area and Los Angeles even exceed $500,000.


How Much Should You Budget For Your ADU Project?

ADUs have three main costs to build into your budget: design fees, permitting fees, and construction costs.

ADU Design Cost

For a custom designed ADU you can expect that the design cost will be between 10-20% of your total project costs. These would include the cost of an architect or designer, structural engineer, surveyor, and other consultants that may be needed. Although most people decide they want a custom designed ADU that is specific to their needs, aesthetic taste, and responds to the unique character of their property, it is possible to save on the design cost by starting with a pre-designed ADU plan set. If you are trying to bootstrap a project and reduce costs as much as possible this could be a good way to go. We sell ADU floor plans of our past projects for those looking to save time and money. Shop for a floor plan design that works for you here: Modern ADU Floor Plans

ADU Permitting Cost

Permitting fees can vary greatly from city to city, but in Portland, Oregon you can expect that the permit fees for a detached ADU would be between $6,000 and $14,000, potentially more if you are going to use the ADU as a short term rental like Airbnb or VRBO. The big range here has to do with water service and whether you will have to upgrade the water meter for the property and/or add a new water meter for the accessory dwelling unit. If you are able to simply tie in to the existing water and sewer service of the main house you would fall on the lower end of the range. However, you may want to chose to install a new water meter if you will be using the ADU for rental income, so you can pass on the water utility bill to the tenants.

ADU Construction Cost

Construction cost is the big variable and depends on the site conditions, project size, design complexity, and the selection of materials and systems. We find that with today’s construction costs building an ADU, even smaller simpler projects on flat sites, will come in at $200,000 or more. That is sort of the baseline price, and the cost can go up from there depending on some of the variables mentioned above. Building an ADU can be complicated and we don’t advise taking shortcuts to save cost.

Although $200,000 is achievable for a nice but simple ADU, in our experience, most clients decide to add features that drives the cost up from that baseline. Whether it is nicer windows, higher performing systems, nicer interior finishes, high-end appliances, or premium materials, there is almost always a decision that is made where the clients balance the quality vs price and decide to upgrade the design. For this reason, we say that the average price of an ADU is about $250,000 in the Portland market. In places like the Bay Area or Seattle the average cost for an ADU is closer to $350,000 or more. On the higher end of the scale, if you are looking for a premium luxury ADU with the top of the line systems and appliances, high-end materials, and a premium design, you can look to spend $400,000 to $500,000 or even more.

Keep in mind that these construction cost estimates are for the construction only. On top of the construction costs needed to build the ADU, there would be the 10-15% in design fees and $6,000 to $14,000 in permitting fees. When you build your budget and talk to your design team about the project costs, make sure to be clear what the costs of construction are and what the total project costs are. $200,000 in construction costs probably means a total ADU project budget of closer to $240,000.

Interior view of a studio ADU on the second floor with a home office below.

Interior view of a studio ADU on the second floor with a home office below.

 
This project current being designed is on a sloped site which requires additional concrete foundation work.

This project current being designed is on a sloped site which requires additional concrete foundation work.


Accessory Dwelling Unit (ADU) Construction Cost Breakdown:

To give you a sense of how the construction budget gets to those ranges, below we have broken down a budget for a 790 square foot ADU we designed in the Cully Neighborhood in NE Portland. This ADU is being used to generate rental income and the couple who built it plan to move into the ADU when their kids leave the house. It was designed for aging-in-place with all necessary living functions on a single level.

Below is a rough construction cost breakdown for a 790 square foot sustainable ADU that was built in the summer of 2015 in Portland, OR (we’ve inflated pricing below to reflect an average 6% construction cost increase per year since that time). This design has a few unique elements that are reflected in the cost breakdown. The design includes a high performance envelope - typical wall construction with standard batt insulation walls & roof per code, plus an additional 2” of continuous exterior insulation on all the walls, and an additional 3” of continuous exterior insulation added to the roof, plus a fully insulated slab. We also designed it to have radiant floor heating with an on-demand hot water system. There was also a couple of unique custom windows that are significantly more than standard windows would be - however they were important to the design and function of the spaces.  

Finally, this breakdown is for the construction costs and doesn't include Architectural or Structural Design Fees. The design fees vary depending on the complexity and size of your project. We recommend budgeting about 10-15% on top of the construction cost for design fees, $6-14k for permitting, and we always recommend budgeting another 10% as a contingency fund to cover any unexpected costs that may come up.

Permits: $12,000
This includes the current Portland SDC Waiver. Typically permitting fees for an ADU fall around $6-$14k. This project came in at the higher end due to the fact we had to upgrade the water supply line & meter size due to the amount of plumbing fixtures in the main house and ADU combined.

Excavation: $15,000
Around a 650sf slab area including the exterior decks. Also included excavation for a couple landscaping retaining walls on the property.

Concrete Work: Footings & Retaining Walls: $28,000
This includes work needed for the ADU plus a couple of retaining walls that were designed as part of the surrounding landscaping.

Concrete Slab: $8,000
The interior exposed concrete slab and finishing for the floor of the main level. This was poured as a separate slab from the foundation footings.

Framing and Sheathing: $25,000
Typical 2x6 stud wall construction, 2x12 roof joists, supporting structural posts and beams. The large exposed glulam beam in the center of the project was around 30’ long to span the length of the living space.

Siding: $12,000
Horizontal fiber cement siding with vertical tongue & groove cedar siding at the front entry and back patio, as well as a cedar soffit under the eaves.

Roofing: $15,000
Standing seam metal roof

Windows and Doors: $15,000
2 custom windows (including a complex window that wraps the corner of the kitchen), 3 skylights, 8’ front door with sidelite, 8’ two panel sliding door, and three large vinyl sliding windows.

Plumbing: $25,000
Includes radiant floor heating installation and an on demand hot water system. Plumbing fixtures, sump pump, fire protection sprinklers & installation.

Electrical & Fixtures: $20,000
Electrical panel, electrical wiring, outlets and switches, lighting fixtures, and installation labor.

Insulation: $12,000
Roxul batt insulation in walls and ceiling stud cavities per code, plus an additional 2” of continuous exterior polyiso insulation on all walls, 3” of continuous exterior polyiso insulation added to the roof, and a fully insulated slab on grade. (This amount of insulation is well above code requirements and is close to passive house standards. With some solar panels this ADU could easily achieve net zero energy. )

Sheetrock (Drywall): $10,000
Drywall, mudding, taping, sanding

Interior Doors: $2,500
2 standard doors, 1 pocket door and 3 closet bi-folding doors

Paint - Exterior: $5,500
One color, no accent or trim color

Paint - Interior: $8,000
One color throughout the interior.

Trim Work: $5,500
1x4 painted MDF base trim, plus clear coated fir window sills

Cabinets: $6,500
IKEA kitchen cabinets and some custom casework in laundry and bathroom

Countertops: $1,500
Ikea wood countertops material and install labor

Tile: $7,000
Kitchen backsplash and shower - materials and labor

Staircase: $3,500
Off the shelf spiral staircase kit

Flooring in Loft: $3,500
Pre-finished solid White Oak, about $8/sf plus misc. materials and install labor

Cable Railing: $3,500
Off the shelf system

Appliances: $7,000
Stovetop, oven, vent hood, dishwasher, garbage disposal, refrigerator, washer, and dryer

TOTAL: $251,000
Includes all materials, labor and contractor fees.

The budget above is fairly typical for ADUs we have worked on over the years. And it is important to point out that this wasn’t a high-end or luxurious project. There were a few places where the clients made decisions to invest more to get the result they were looking for. For instance we had some custom windows, skylights, and radiant floor heating. The rigid insulation was also an upfront cost but will pay itself back through lower energy bills for the lifetime of the project. Meanwhile, the rest of the project was pretty standard materials and systems and in some places we used cheaper than normal elements, like the Ikea kitchen. Overall, we think this is a good starting point for most people who want a high-quality, nicely designed accessory dwelling unit in Portland, Oregon.

Important Note:
Every site is different and the conditions can greatly impact cost. Excavation and concrete work costs can vary greatly depending on the topography and of the site and other conditions (is it sloped? lots of trees? poor soil conditions? Does it need extra soil removal or backfill?). Ease of access to the location of the ADU can also add costs (are there fences that need to be removed and rebuilt? Can machinery get to the location to excavate or deliver materials? will a crane rental be required?). Material selections and other design decisions you and your designer will make throughout the process will also have a big impact on cost. The outline above is a good starting out point but I guarantee your project will end up being different.

If you have any questions don't hesitate to reach out. We are always happy to talk about the unique aspects of your project and talk through your goals and ideas for a sustainable Accessory Dwelling Unit.

This ADU in the Cully Neighborhood of Portland would cost about $250,000 to build.

This ADU in the Cully Neighborhood of Portland would cost about $250,000 to build.

 
Interior view of the ADU’s main living space with an open loft above. A 30’ long glulam beam spans the length of the living room.

Interior view of the ADU’s main living space with an open loft above. A 30’ long glulam beam spans the length of the living room.

 
A large custom window wraps the corner kitchen, offering great views to the surrounding yard.

A large custom window wraps the corner kitchen, offering great views to the surrounding yard.

Why Everyone Should Consider Building an ADU

A modern Detached ADU in Portland, OR designed by Lucas Gray

A modern Detached ADU in Portland, OR designed by Lucas Gray

Across America, cities and towns are facing rapidly rising housing prices that outpace increases in salaries. This is causing a housing crisis where the average person can't afford to own a home and sometimes can't even find affordable rental units. This is a huge issue here in Portland, Oregon and the government and many passionate citizens are trying to develop solutions. Sometimes this comes in the form of publicly subsidized affordable housing, yet there is also a movement to address this through market rate solutions in the form of Accessory Dwelling Units or ADUs.

ADUs, sometimes called laneway housing, granny flats, DADUs, backyard cottages, and many other terms, is a small secondary house built on the property of a typical single family house. Although each jurisdiction that allows these housing types has different rules and regulations, for the most part they all lead to the same end result - more housing options in our neighborhoods while preserving neighborhood character. They add density in a sensitive way while giving homeowners the potential for rental income, and renters an affordable housing type in neighborhoods throughout the city.

There are three primary uses for ADUs. Many people build them to downsize their life. Perhaps their kids have left the house and they no longer need as much space. Adding an ADU in the backyard can be a great way to downsize your living space while renting out the main house to a new family to grow in. Another common use is for aging family members. Often ADUs are built for barrier free living and Accessibility for aging-in-place or multi-generations living together on a shared property. The third primary use is as a rental unit, either long-term rental or short-term (think Airbnb). For this last use, the benefit is that the ADU can provide additional income and help cover mortgage payments. This can help people afford to stay in their homes as costs increase, or allow young families to be able to afford buying a home in the first place.

ADUs are not allowed in all jurisdictions although they are growing in popularity and most cities and towns are considering ways to allow them within their codes and regulations. In Portland, ADUs are limited to 800sf in size and 20' in height. The goal being to keep the accessory dwelling a bit smaller than the main house. This still is enough space to have a very nice 1 to 2 bedroom unit. Within this size limitation, there are endless options and creative design solutions to make these projects wonderful places to live.

I have worked on more than 50 ADU projects over the past 8 years and have become an expert in designing creative small scale housing that still becomes a great place to call home. I love this project type because it addresses so many of the issues facing our cities - ADUs increase density, they are small and efficient homes and are inherently sustainable, they provide supplemental income to homeowners often preventing displacement and allowing people to stay in their neighborhoods, and they are fast paced design projects that allow for creativity and experimentation.

A full sized kitchen with custom cabinetry fits nicely into this 700sf ADU.

A full sized kitchen with custom cabinetry fits nicely into this 700sf ADU.

Working with people of all backgrounds that are interested in ADUs is one of my passions. I love education people about the opportunities and challenges of these project types and answering questions about cost of construction, how long it takes to design and build an ADU, and design regulations that affect these projects. Please feel free to reach out if you are considering one of these projects on your property. I’d love to help.

Although ADUs are small projects, they are still complicated and need a close attention to detail to make them successful. This is another reason why reaching out to an experienced design team is important to achieve a great ADU. Fitting all the parts of a full house in an 800sf size is challenging and needs some creative space planning. I have many examples of ADU designs, floor plans, and other resources that can help inform your thoughts as you consider adding an ADU to your property. Using my breadth of experience I can help make your project be successful while balancing beautiful designs with functional layouts that meet the project budget.

A spacious ADU bathroom with no threshold shower designed for barrier free living and aging in place.

A spacious ADU bathroom with no threshold shower designed for barrier free living and aging in place.

ADUs can come in a variety of styles to fit your needs, taste, and the context in which they are built. Some places have restrictions on what they can look like, but for the most part ADU designs can be traditional, modern, or any aesthetic that you would like. The options are endless and they can be custom designed to address your unique lifestyle and tastes. If you are considering an ADU, I am available to help guide you through the design, permitting and construction process.